
Abused Atari!
Let's renew this mother flubber.

My tiny brother bought an Atari 2600 from an auction. It was in unknown working order, but I have never come across an Atari 2600 woody that hasn’t worked. These things are bomb proof. Although, the cases are not -


If you zoom into the first picture, I DO NOT AGREE. Back off, China.
[Youtuber Title] YOU WOULD NOT BELIEVE WHAT I FOUND IN A 2600!!!
Actually, I was genuinely taken aback. I found something incredibly coincidental inside. I promise the next bit is NOT made up for clicks. I found this original quality label inside, taped to the aluminium box (it’s a heavy sixer)

Can you guess what day I opened this up to work on it? Yes, it was the 17th February. When I saw it I thought, '‘hold on, that’s soon”, but it was actually the same day. I opened this 2600 up on it’s 45th birthday. Still working fine, FORTY FIVE years after it was manufactured. I’m going to proudly display this folded over piece of history somewhere on the console when it’s finished.
As you can see from the top pictures, the poor thing has been in the (console) wars. I think it’s too far gone for a repair and I’ve wanted to do a redesigned case for a while, so - here goes!
I started off by doing the almost compulsory AV mod. You bypass the crappy RF box, remove a few components, add in a very small circuit board (I made my own using a PCB fab company) and output the audio and video to composite (RCA) plugs. WAY better picture and sound than ancient RF. The insides of this unit are still in good condition.
Fail Before Starting
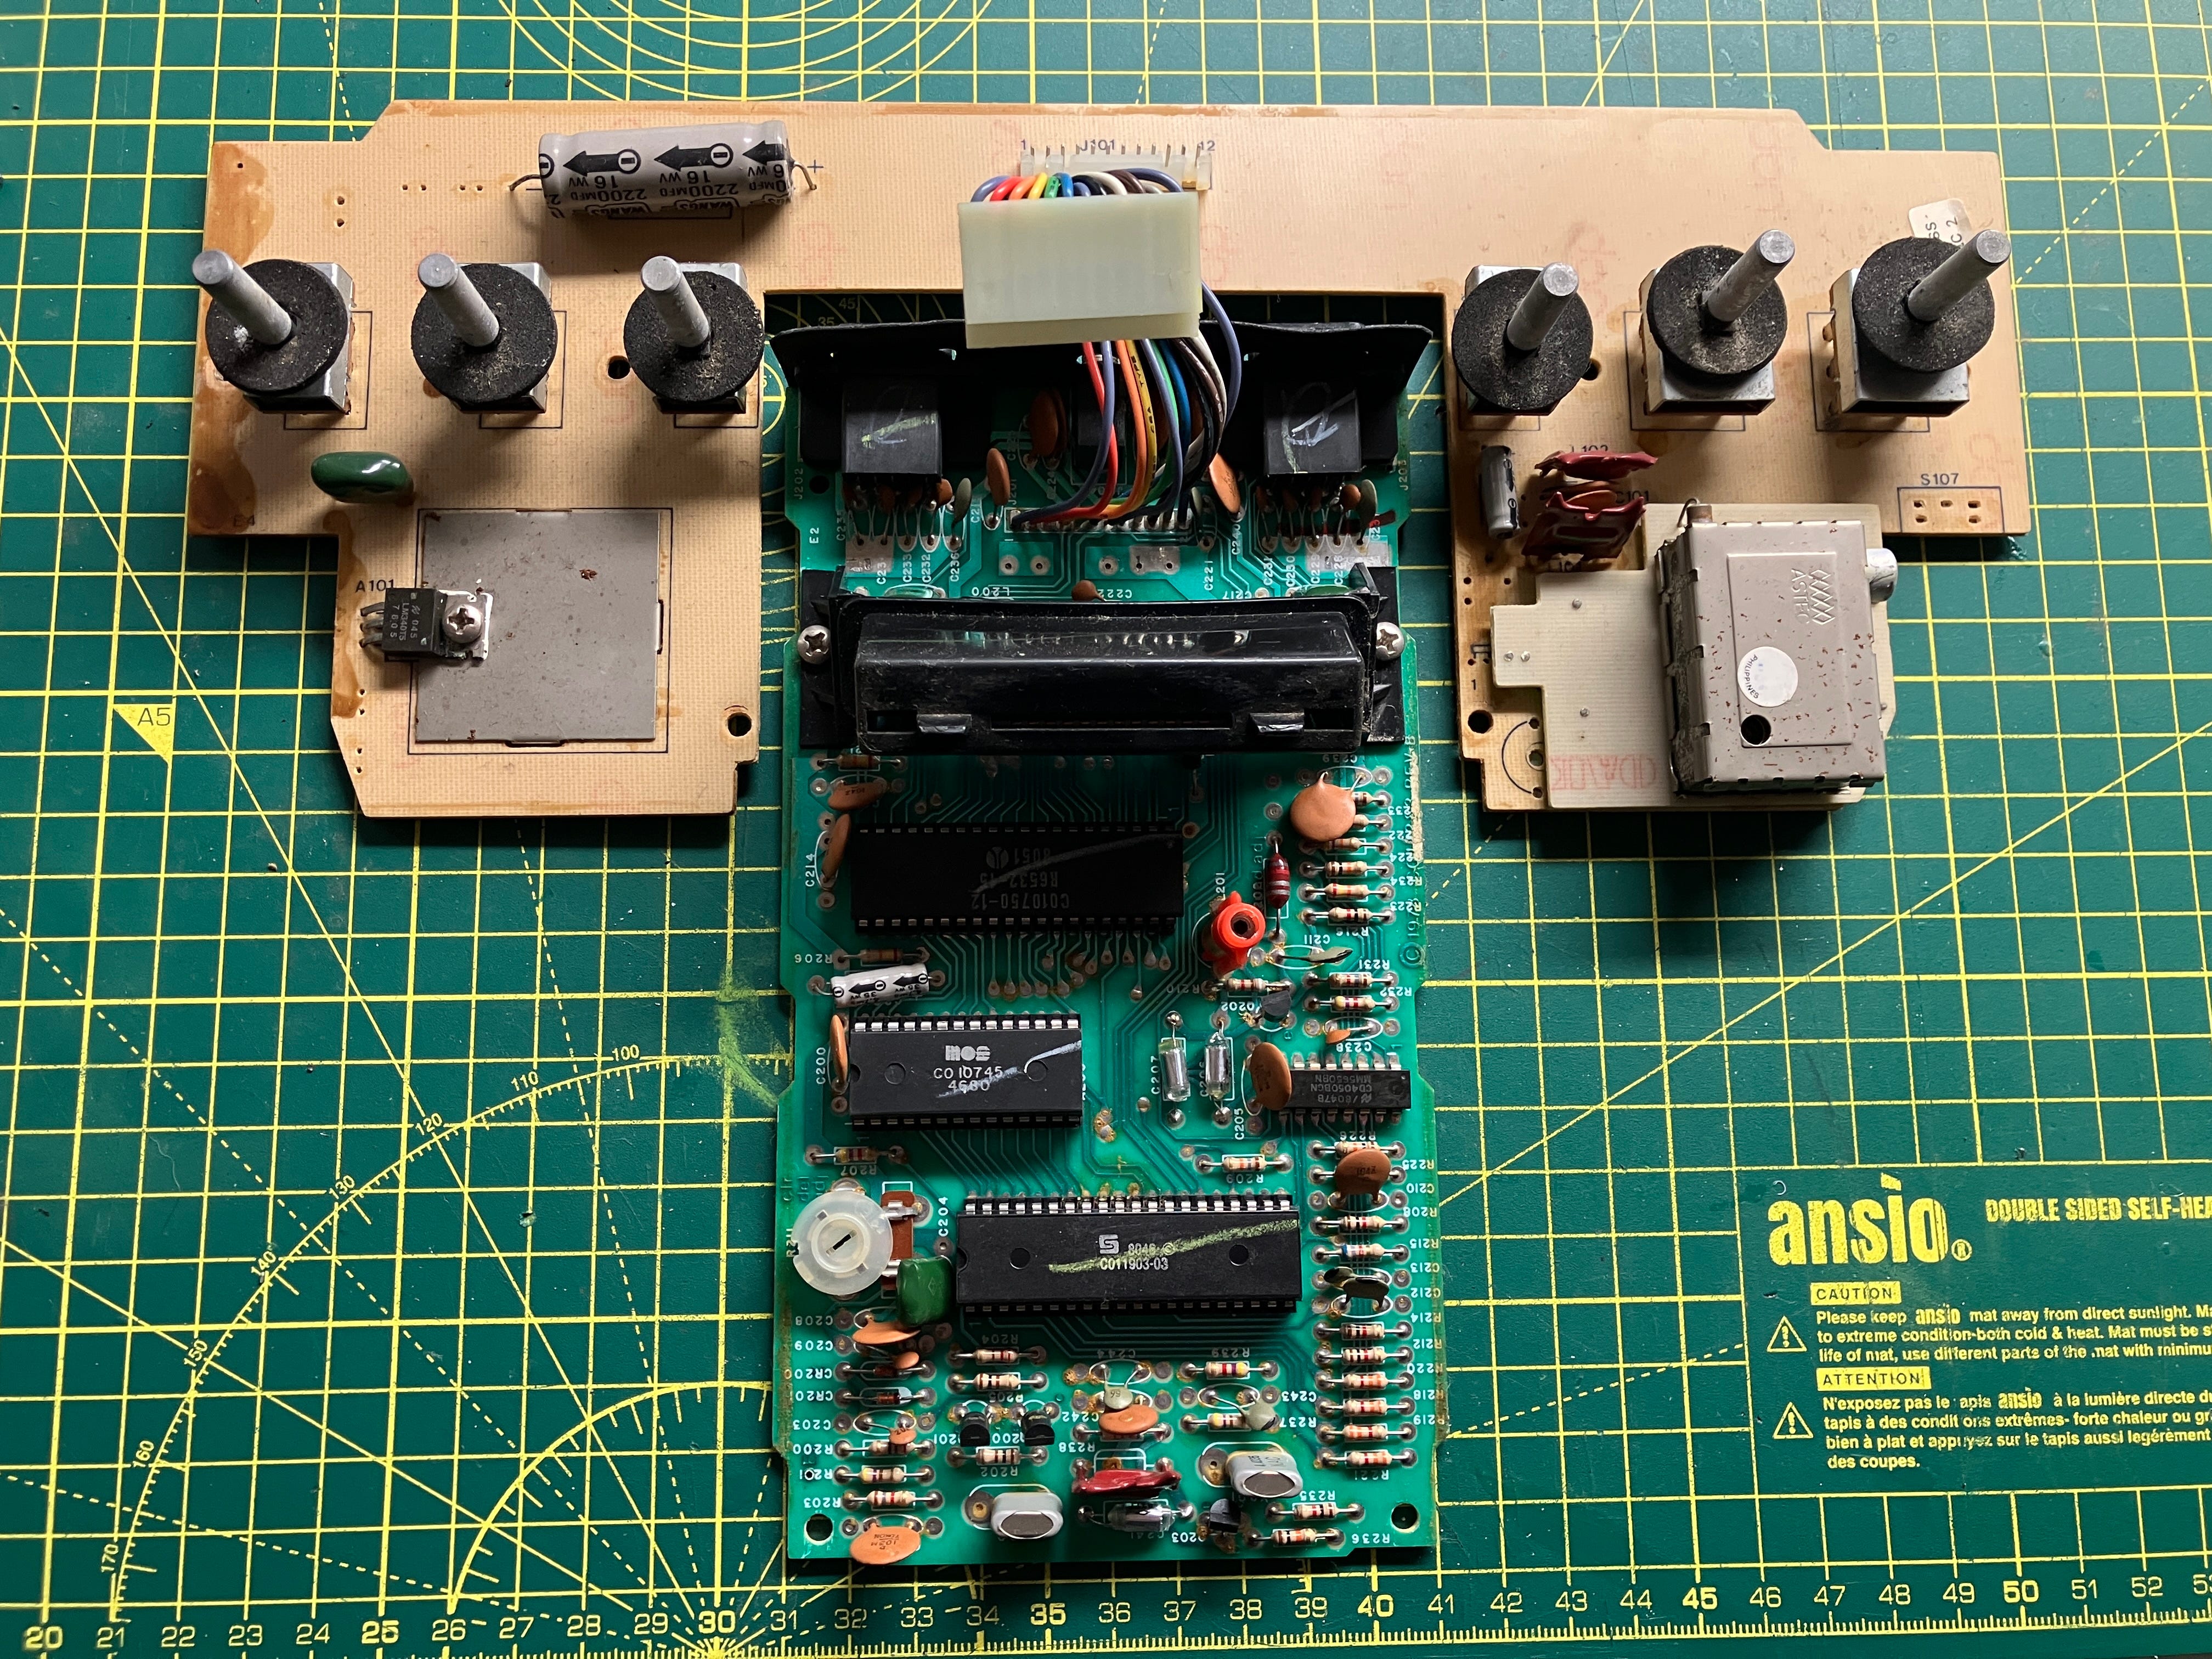
I wanted to reduce the footprint of the 2600 and use a few different knobs and switches. Problem is the silly long top board (the beige coloured PCB). The power goes into the lower PCB and then routed into the top pcb where it is fed into a few components and powers the RF box. It also lowers the 9VDC input down to 5VDC via a voltage regulator. I tried to power the main PCB with a direct +5VDC input, but the console would not fire up. It obviously needs the top board to function. If I plugged the top board in and powered the lower board with a direct +5VDC, it would work, but bypassed the on / off switch.
I asked this question on Atari Age -
“can a 2600 heavy sixer be powered without the top board. I guess it would need some sort of circuit similar to the top board to work?”
But got no replies [sad emoji]
So, I will have to work (literally) around it. This would mean splitting the case into two parts, as my 3D printer is no way large enough to make a case to contain that top board (curses). I have never made a ‘thing’ that needs to be joined before. It will be a learning curve at least…
I’m intending on making this -
The bottom will be beige and the top will be made from a carbon fibre PLA filament. I even bought a hardened hot end specially designed to use with this abrasive material.
All sorts of brackets and stiffeners will be needed to make the case robust. I think it will also look like, either a home made thing or a lost prototype. I’m edging more on the home made idea.
Here is a start. Note the large stiffening / holding together plate underneath the PCB.
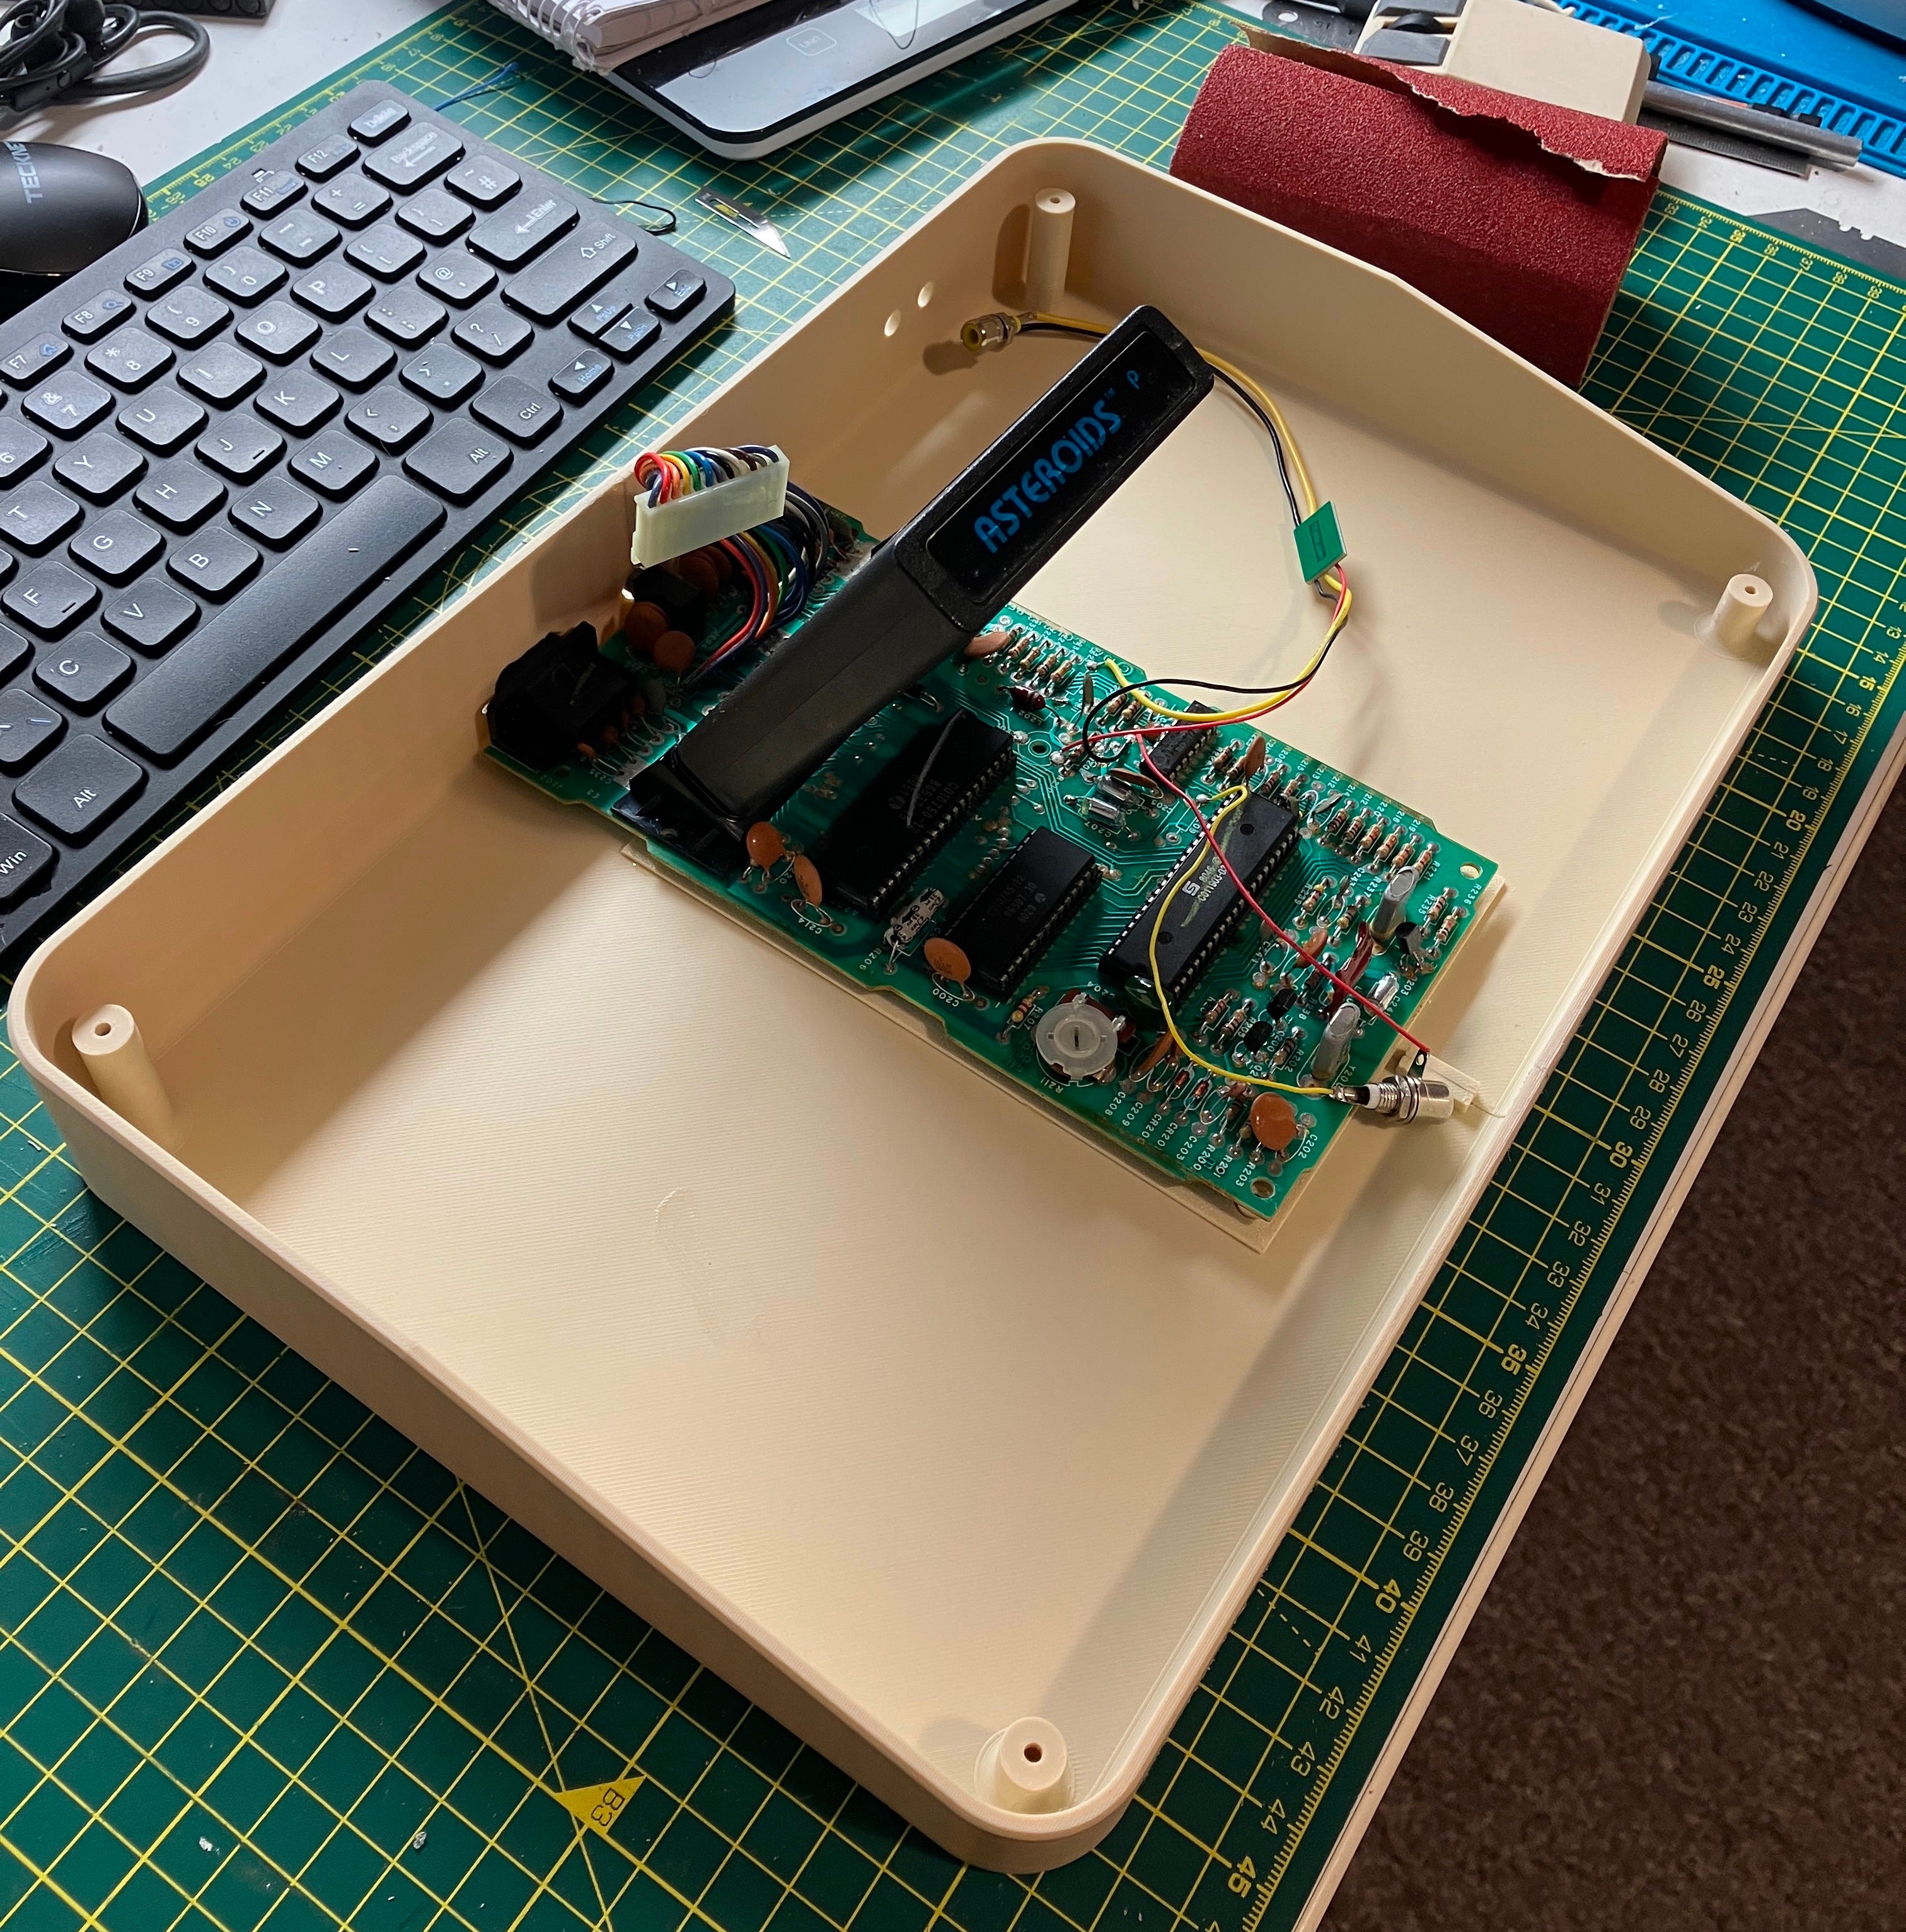
Looking at it now, it rather looks like an Atari 800XL (which I had back in the day and also, now.). You can see the temporary AV mod wiring there. I extended it to those two holes in the back of the case.
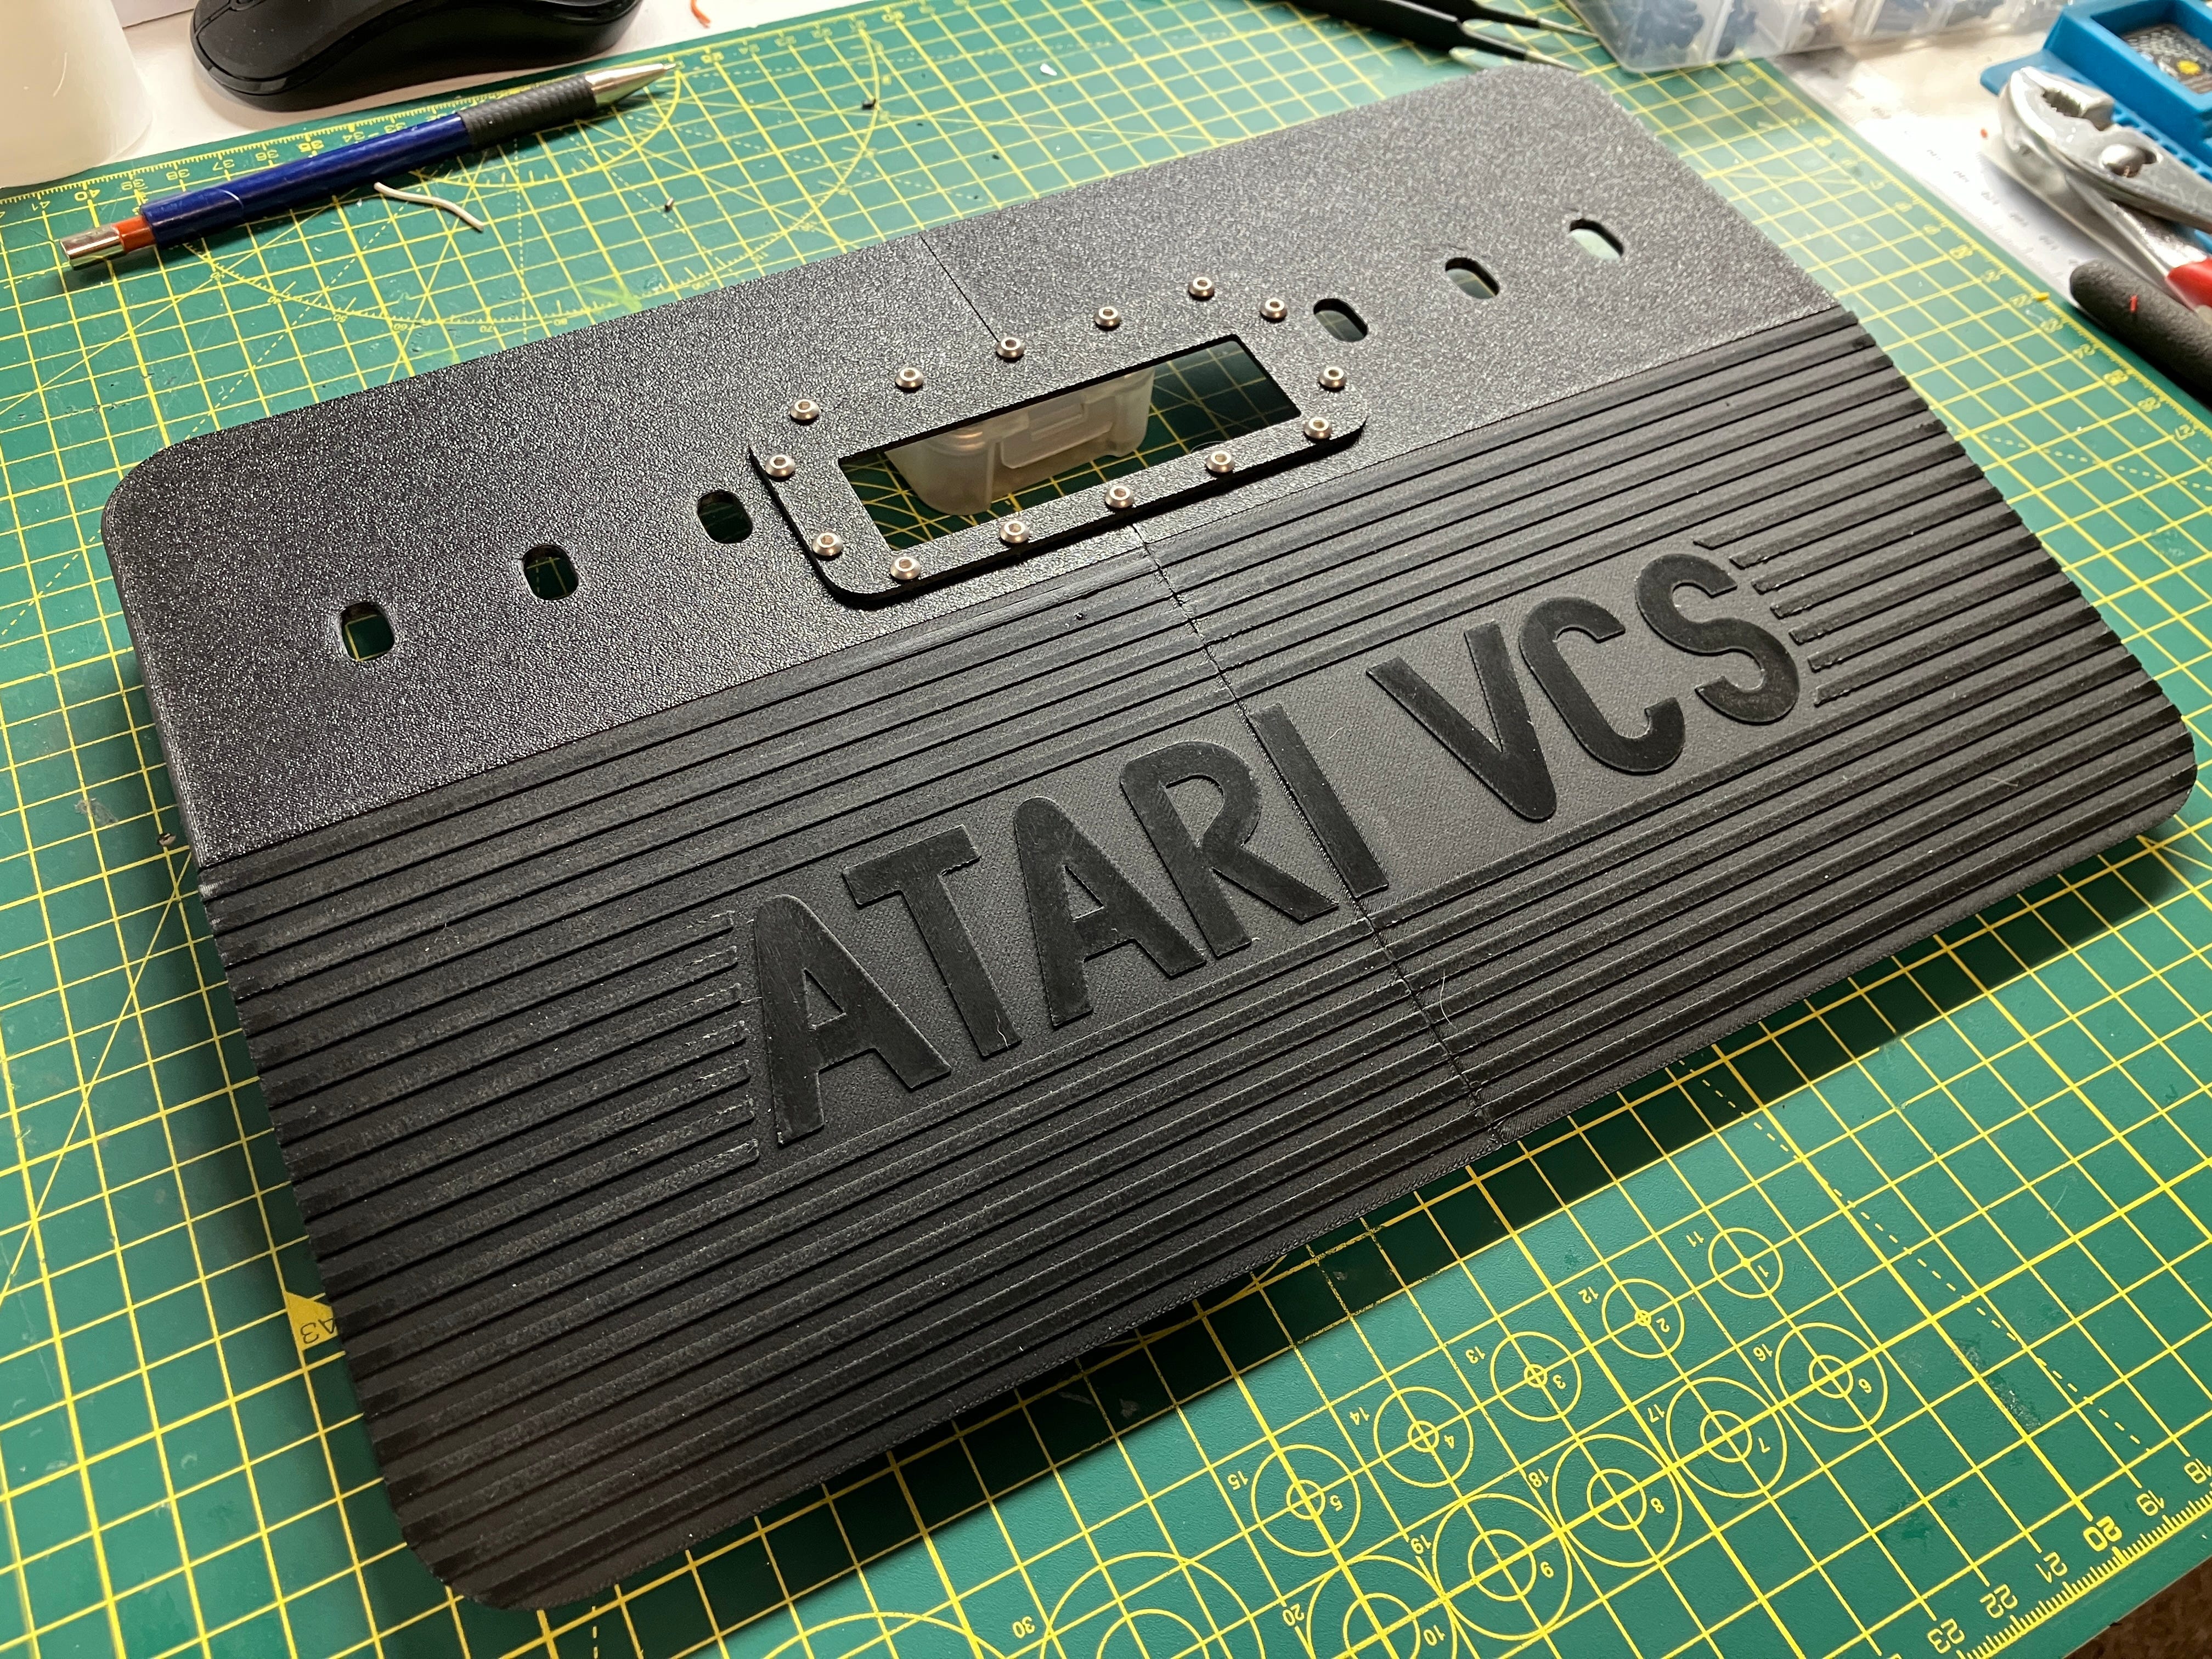
I made a controller bezel, which hides part of the join and gives extra strength to the join in the case. BTW, Can you see the stupid boy error I made?
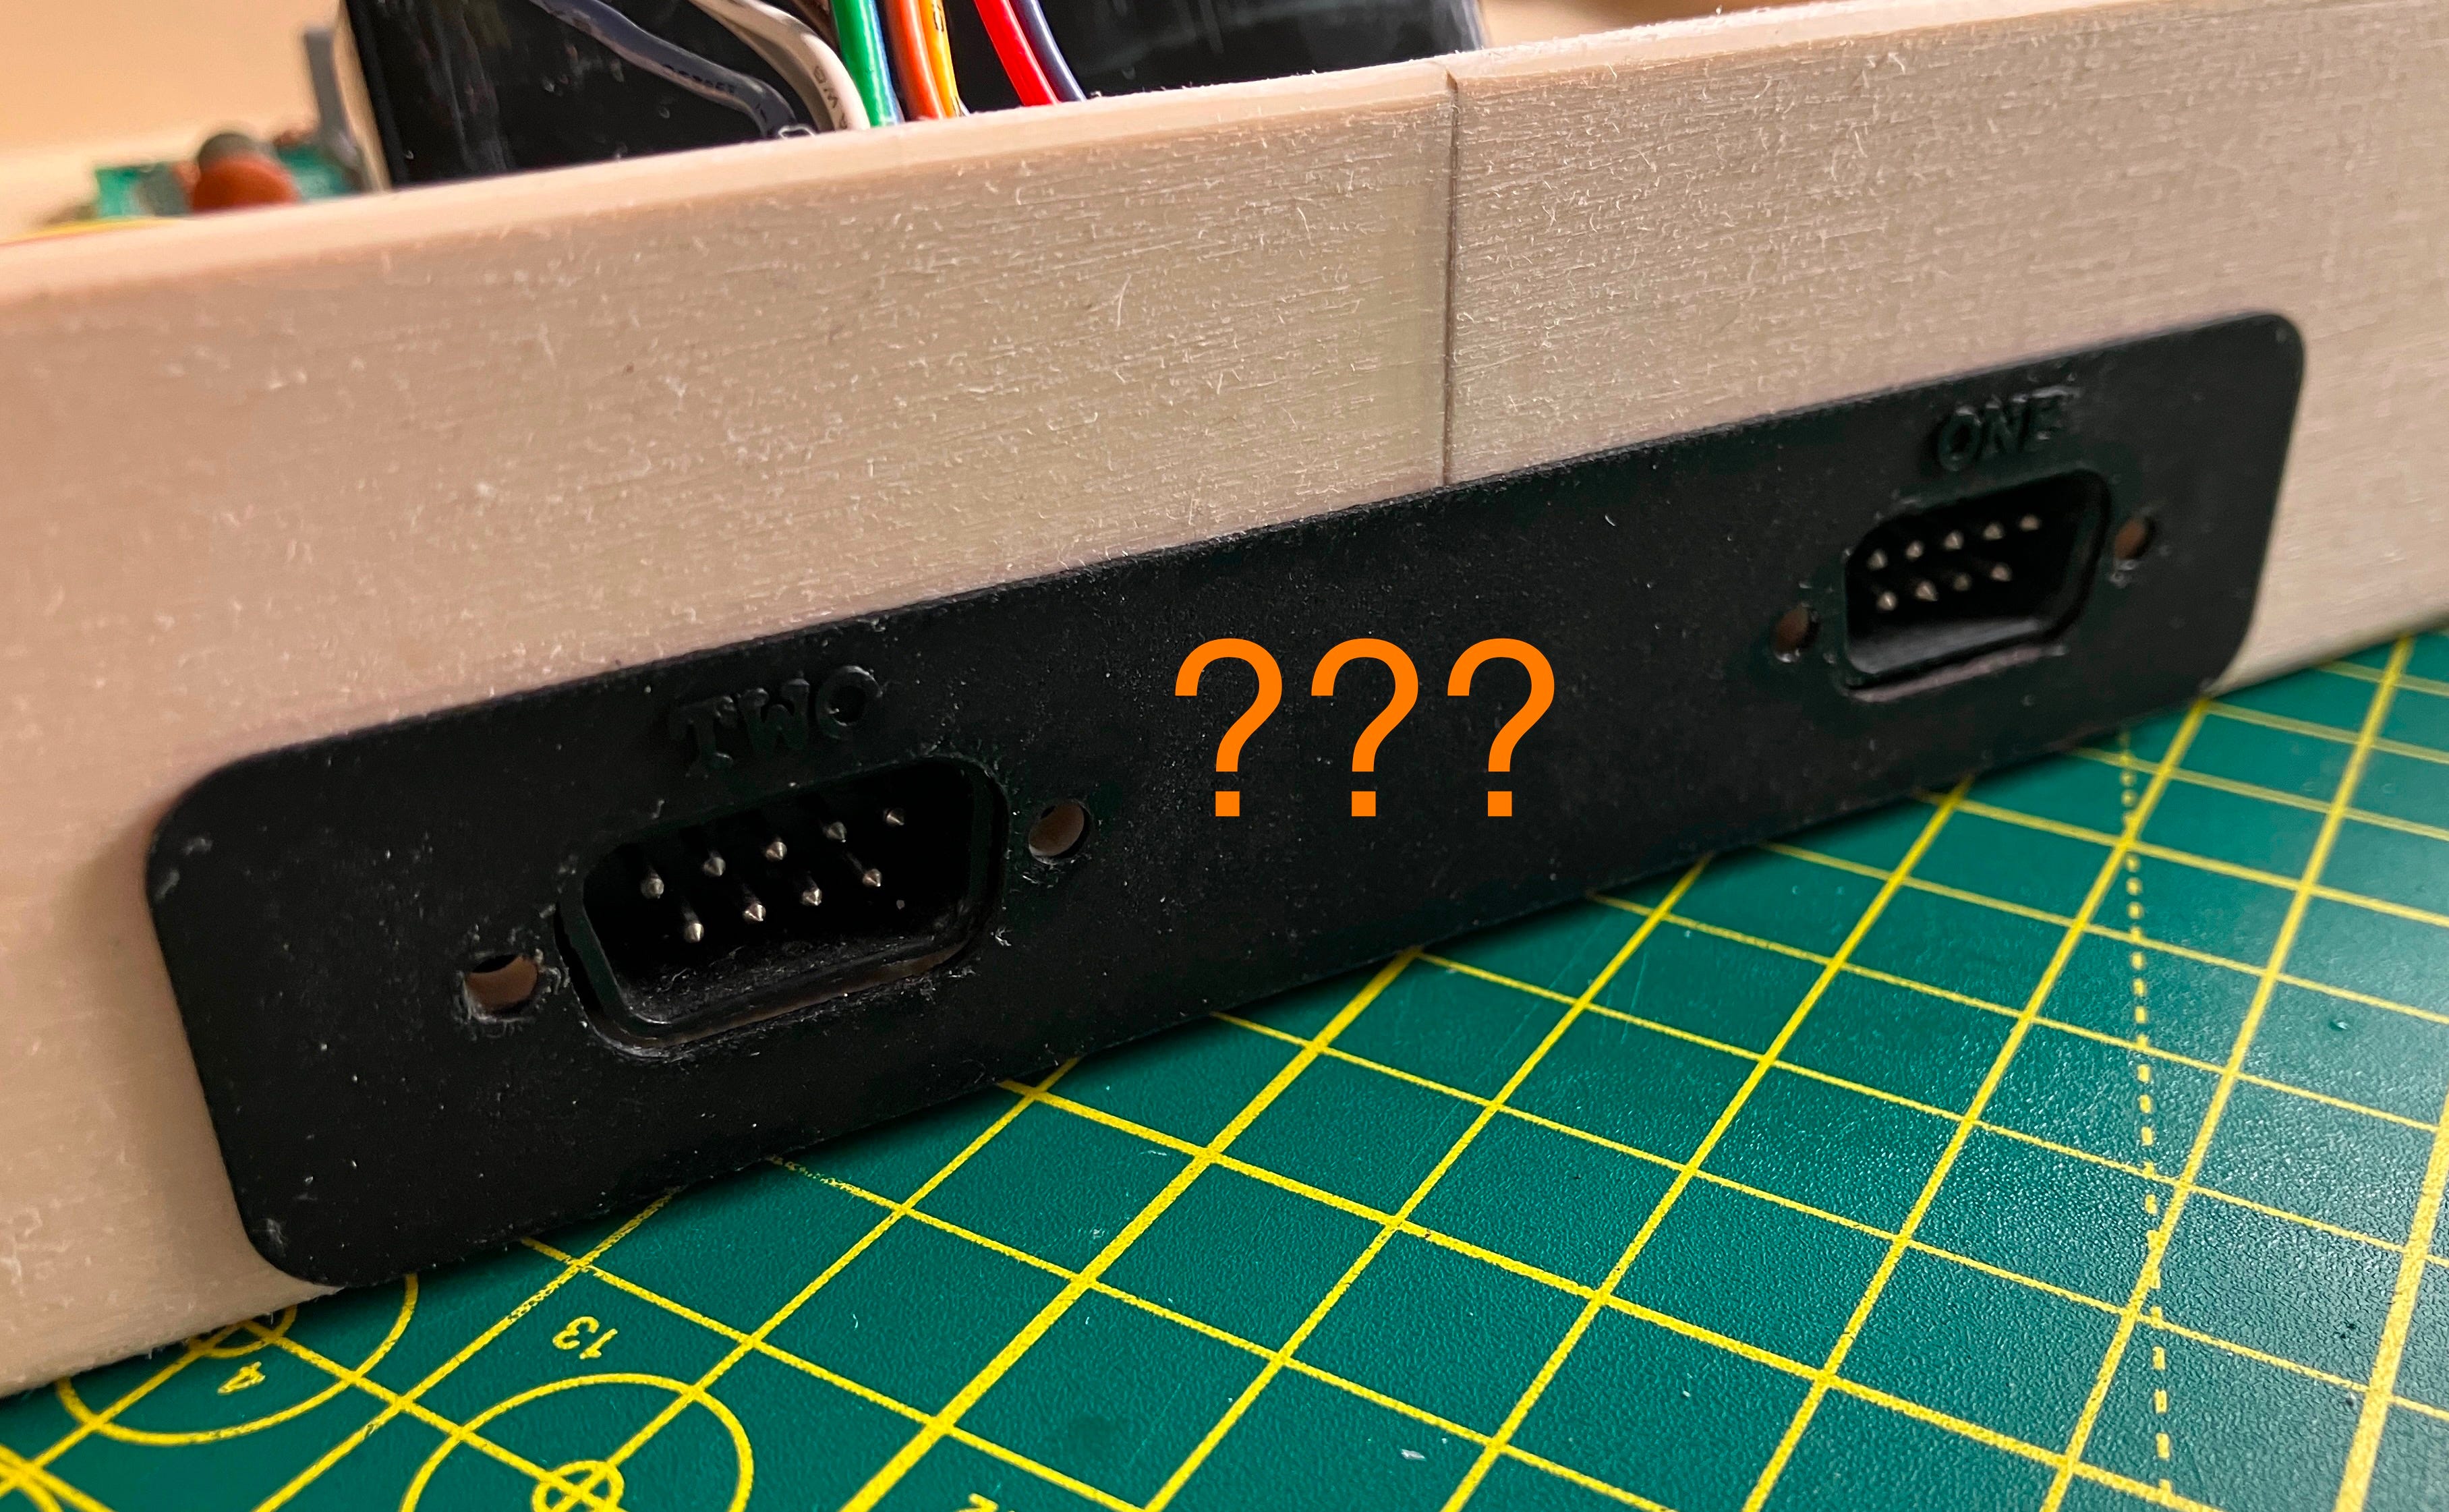
I designed the case with the power supply hole in the two parts, but forgot to put it on the controller bezel. I had also goofy glued the thing on and ‘IT WASN’T GOING ANYWHERE’. Remember kids, think twice, glue once…
I managed to fashion a hole in it and it works. Stupid boy…
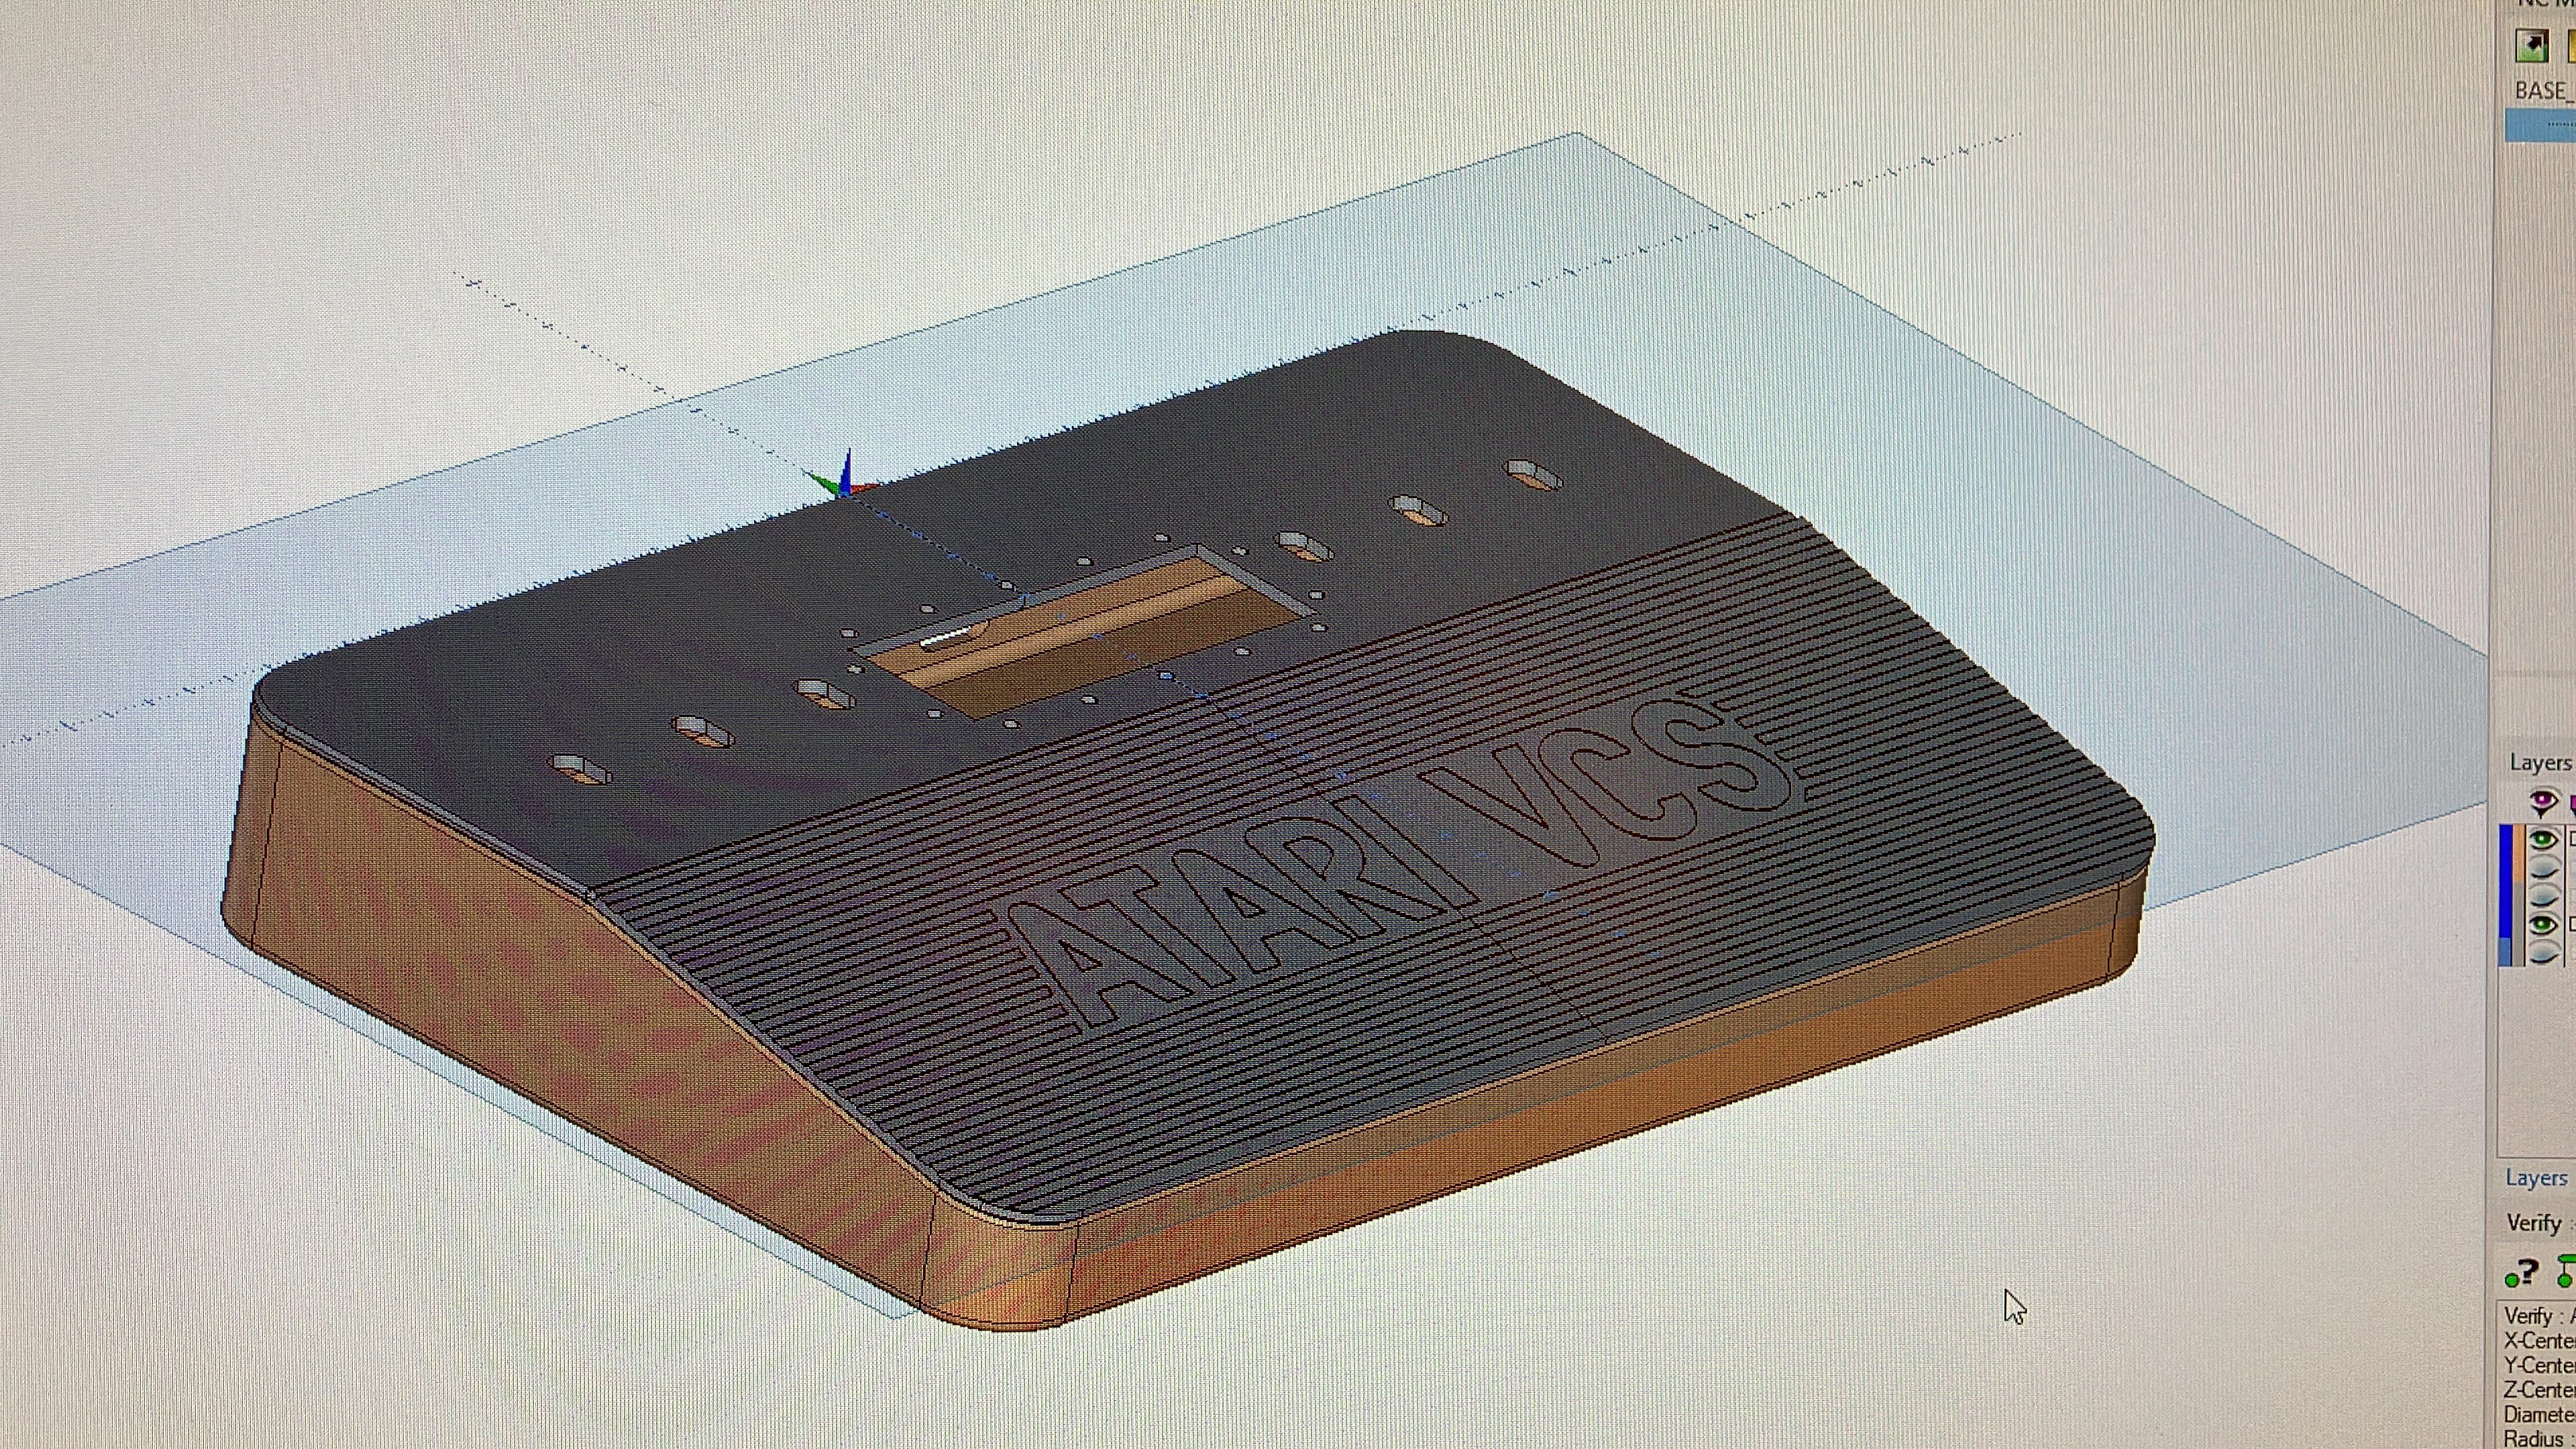
Top Part Of The Case
The lid part of the case is going to be sloped and needs slots for the six switches and of course, the cartridge aperture. I will also need to make a back ‘pocket’ area to fit under it, which will guide the cartridges into the slot on the familiar angle that the original 2600 had. I feel the design requires some sort of over the top embellishment for the lid.
Er, yes. I do love to completely over engineer something.
I really wish I could have made this in one part. I love the look of it, but not wild about the visible joins [cry emoji]. It would also have been nice to made the switch descriptions embossed on the top, but it wouldn’t have worked because of how I had to print the parts. I may just make them and glue them on.
I made a small size miscalculation on the first switch label.
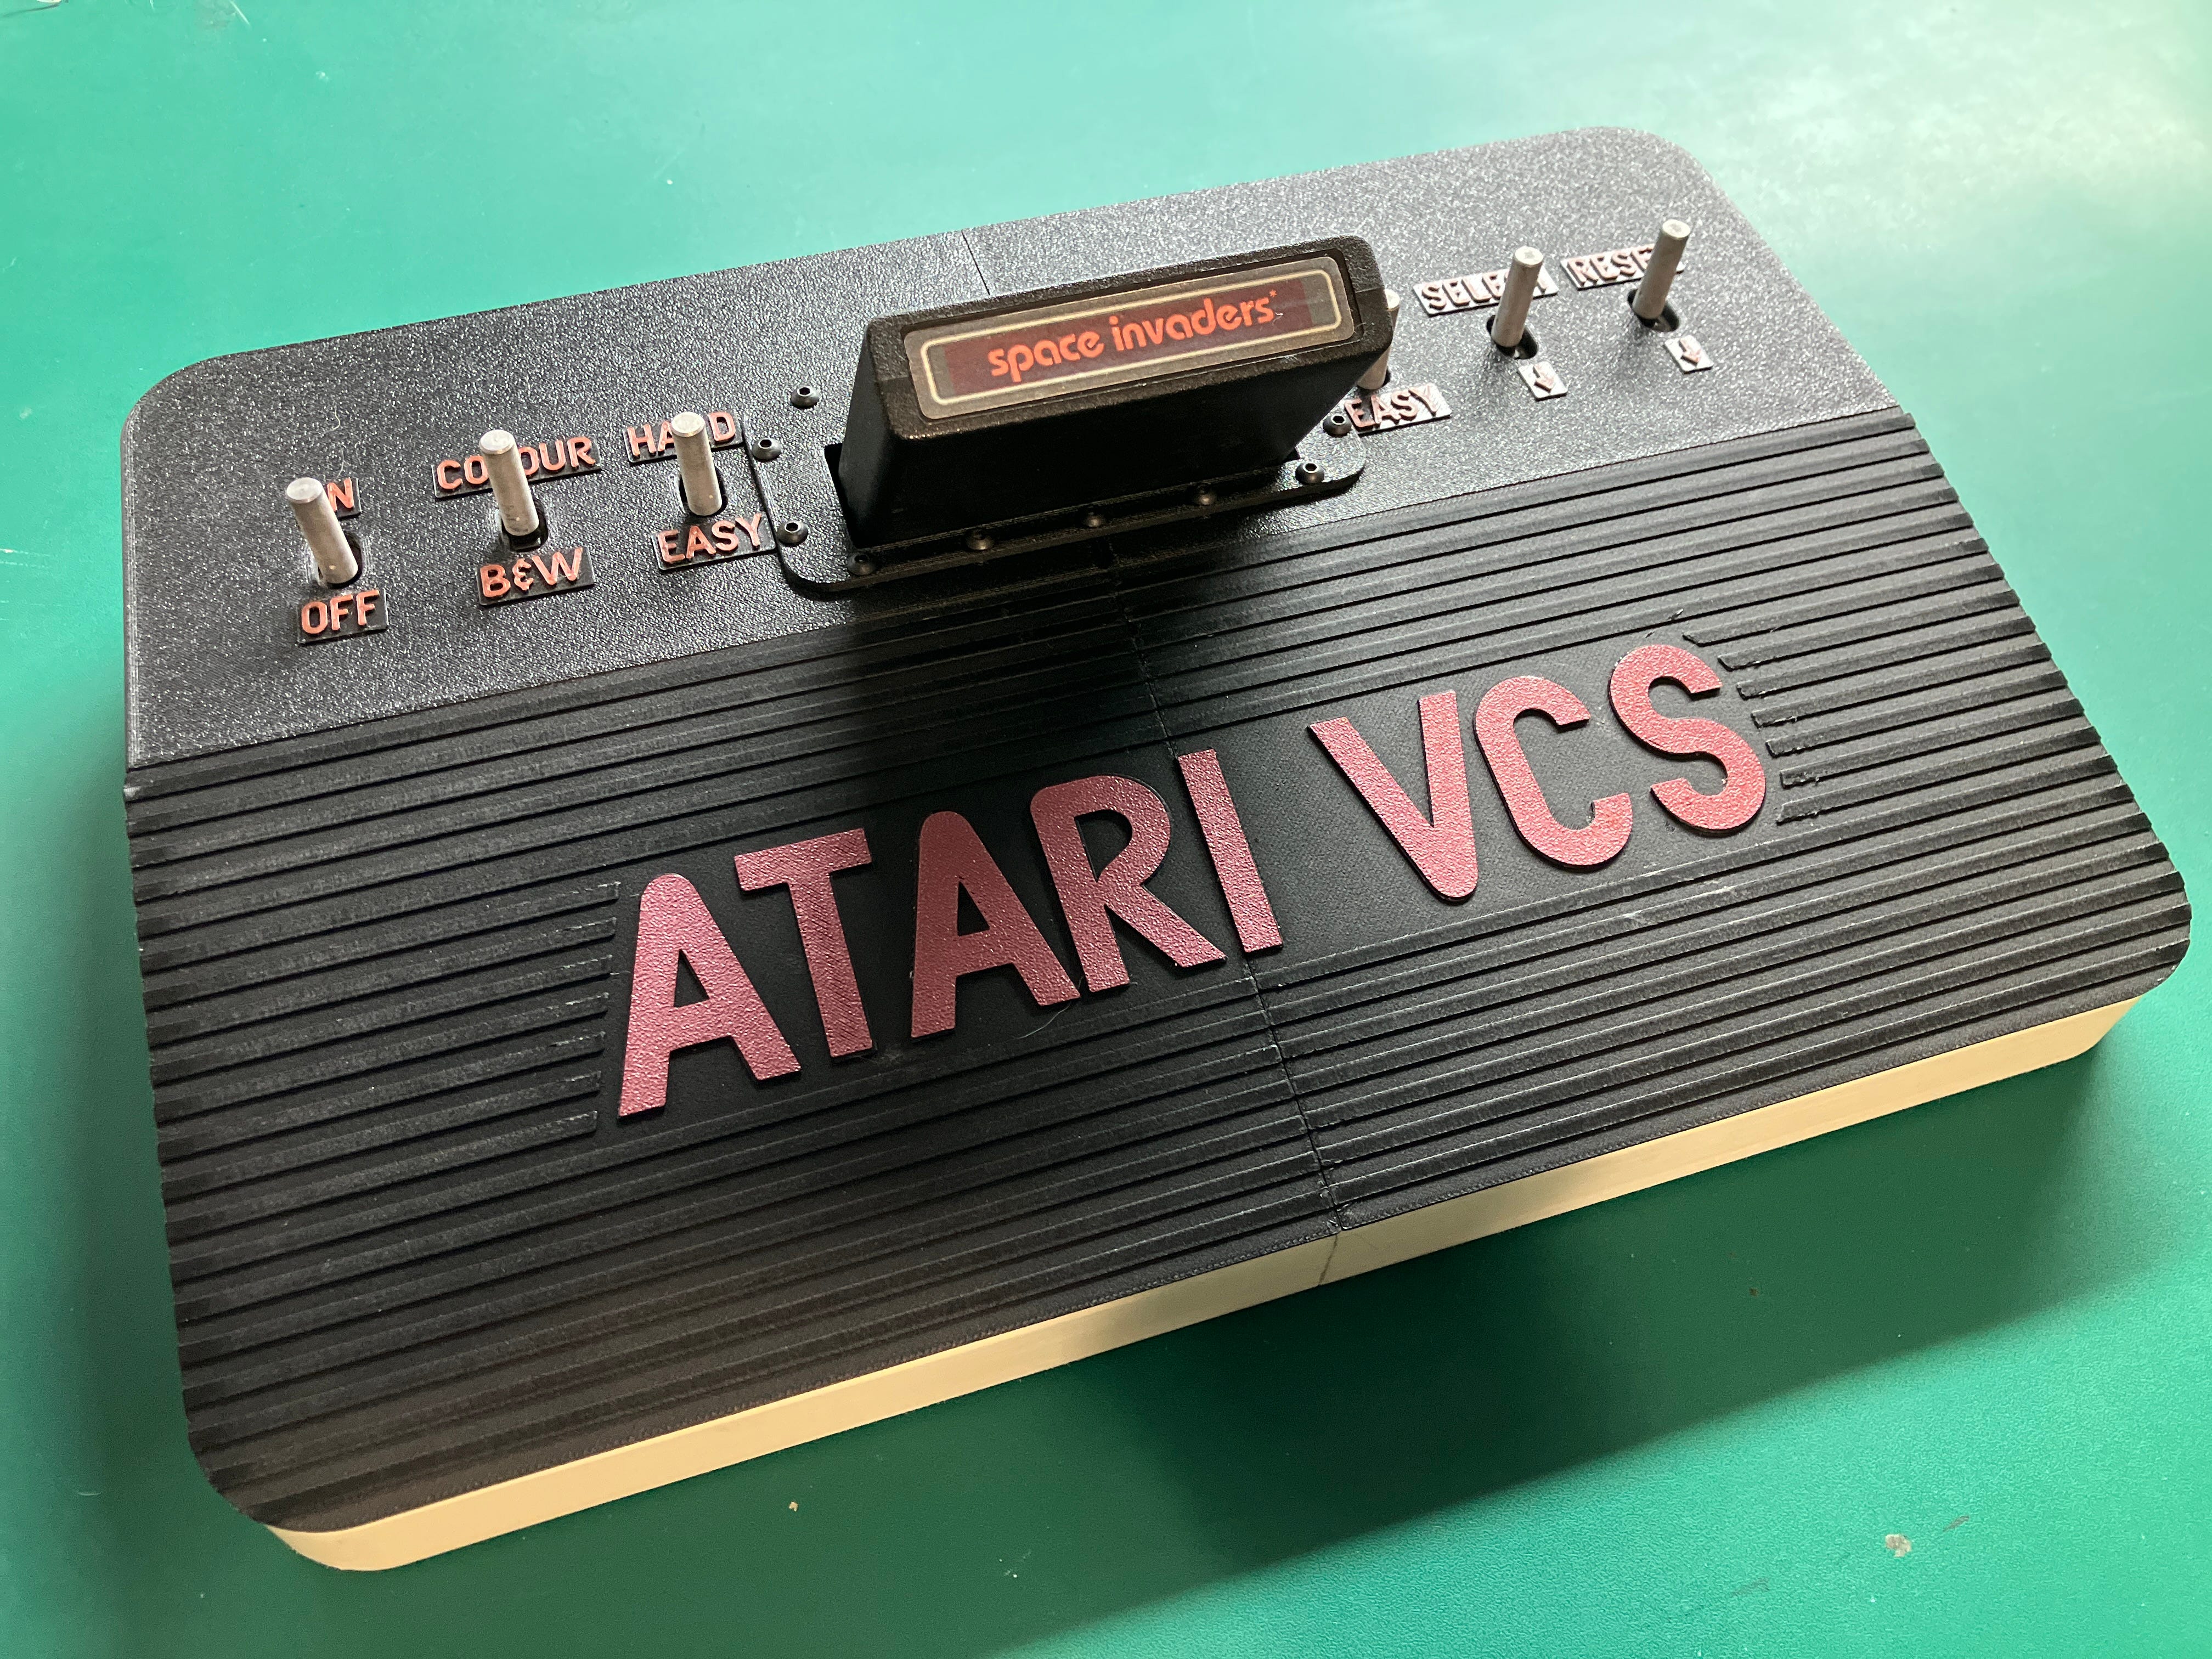
A little bit more work and here it is -


There were twenty 3D printed parts to make this project. I think that is the most parts I’ve done for a single project before. Phew.
BTW - My tiny brother isn’t having this now. It’s mine. I’ve offered to send my good working heavy sixer with joysticks, PSU and a pair of paddles.
Worth it.
That's awesome, I was worried about the split but it don't look half bad! Well done chief 👍
Well now, isn't that a thing of beauty. Excellent stuff, Sir.