
Sega Mark III Upgrades
Future proofing My 1985 Sega Console

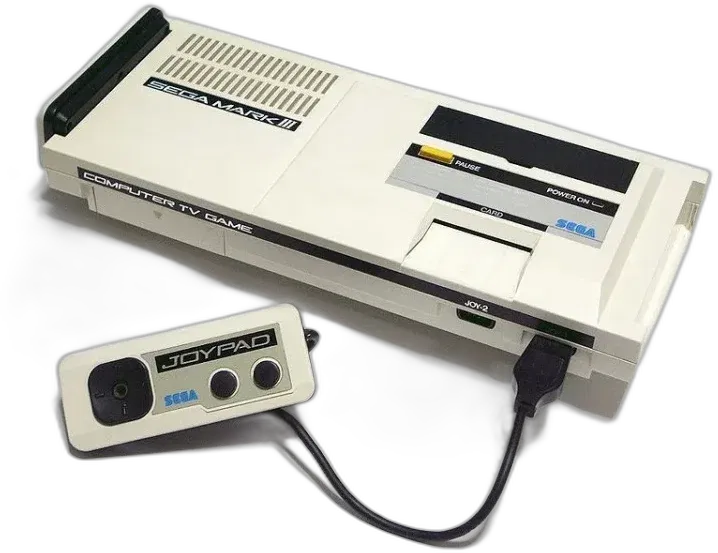
This is a follow up to a previous Tinkering, where I composite modded my Sega Mark III, kindly sent to me by Ian of Funkytown (Funk) I also made a DIY multicart with a Raspberry Pi Pico clone and cleaned up the joypad.
In this blog post I will be addressing -
Crap washed out video output via composite
Pico Multicart can only work with ROM images up to 48k (Sonic is 256k, BTW)
Joypad is horrible. Controls are like herding cats. All over the damn place.
I only have one joypad. Let’s make a pair.
Operation 1 - Composite Upgrade
(The Power of Resistance)
The composite mod was very easy to do and due to the Mark III’s not very good video output (even RGB is faint apparently), I wasn’t that thrilled with the washed out picture the composite mod gave off. Mind you, at least I can play the thing. Japanese RF just wasn’t going to work on any screen I have and RF certainly sucks anyway. Pfft.
I initially thought that the mod would need some sort of circuit to boost the signal, but while at work I thought about other video mods I have researched before and they usually need a 75ohm resistor before the video output to suppress the signal, overloading the whoojamaflip thingy in the display telly box (real words). I soldered a resistor onto the output wire and the other end to the RCA connector and it WORKED! A fantastically easy fix. Having the resistor at the jack end was just for testing. The resistor will be safely inside the console in a minute or two…
Before and after pictures. It’s difficult taking pictures of old CRT screens with stupid modern phones, but if you compare the reds, there is a distinct difference. In real life, it’s night and day. A particularly cloudy night and a beautiful bright summer’s day.


On pacmania, you couldn’t even see the yellow dots on the white background! Unplayable! Here it is fixed up.
Operation 2 - Pico Cart Roms Too Smol
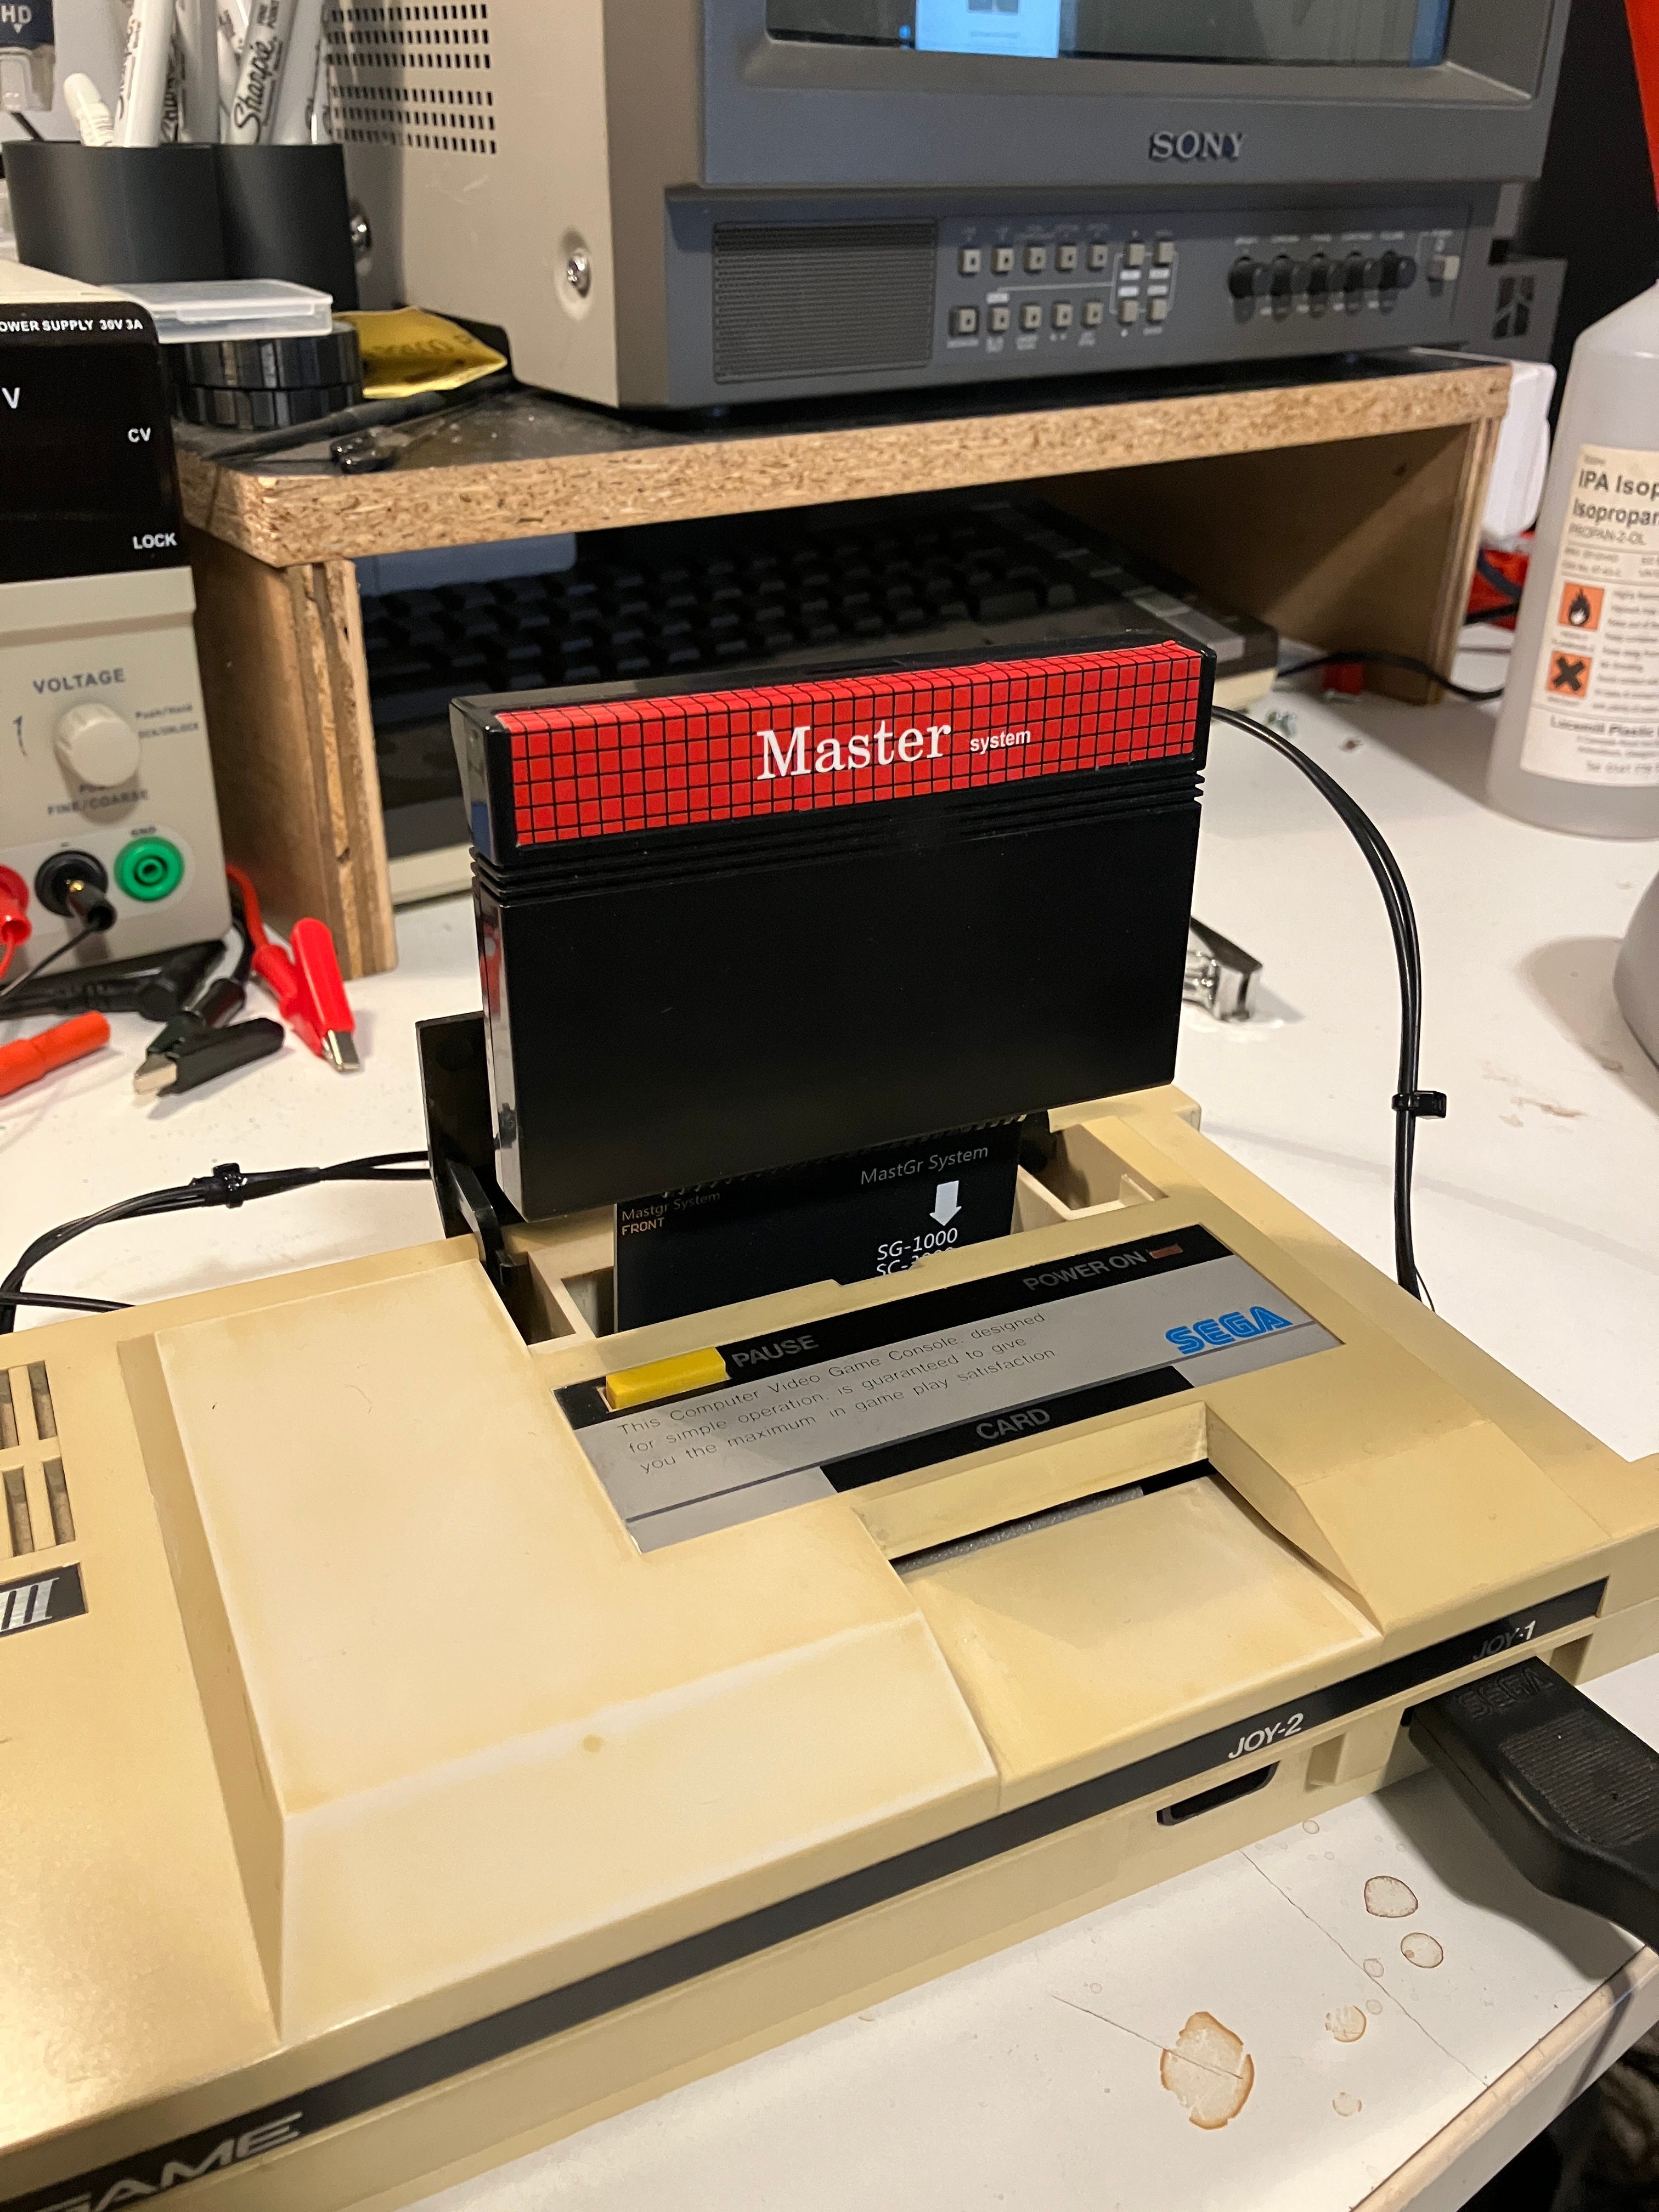
The SD1000 Pico Cart from Aotta, which was based on the original Atari 8 bit A8PicoCart from Robin Edwards is a fantastically cheap way to have all the Sega Mark III games on one very convenient cart. Problem is, the Mark III hardware is virtually identical to the Master System and can play all the games that were later released for it. Problem is, the later games got larger in code size and the Pico Cart can only deal with 48k ROMS or smaller. The Everdrive (or clones) can deal with just about every game made for the SMS and Mark III (probably - I haven’t tested all of them, silly)
Put simply, you can use an inexpensive SMS to SG1000 converter (SG1000 is a very similar model to the Mark III). But it just looks daft. Ridiculous. Surely you can fit those two things in a smaller case?
Challenge Accepted!!!
A few things will need to be implemented, or rather chopped off, to fit in a smaller, neater case. The converter and pcb from the Everdrive clone will need to go back to back, therefore the socket that the SMS cartridge connects into will have to be removed and thrown to the wind. Doing this also brings negative joy, in the form of soldering 44 points on the adaptor to 44 points on the Everdrive clone. I also had to design and make a 3D printed case (in two halves) to securely hold the two PCBs and position them to fit into the console’s cartridge port. I used the already designed and made case from the SD1000 DIY Pico cart as a basis for my design. My design is much smaller than this, which is nice.
After only three re-designs and tweaks, I came up with this and it works just fine and dandy.
NOTE : If you’re going to make one of these for yourself, make sure you know EXACTLY what wires go to where. You wouldn’t want to wire half of it round the wrong way before you realise your mistake [rolls eyes emoji]
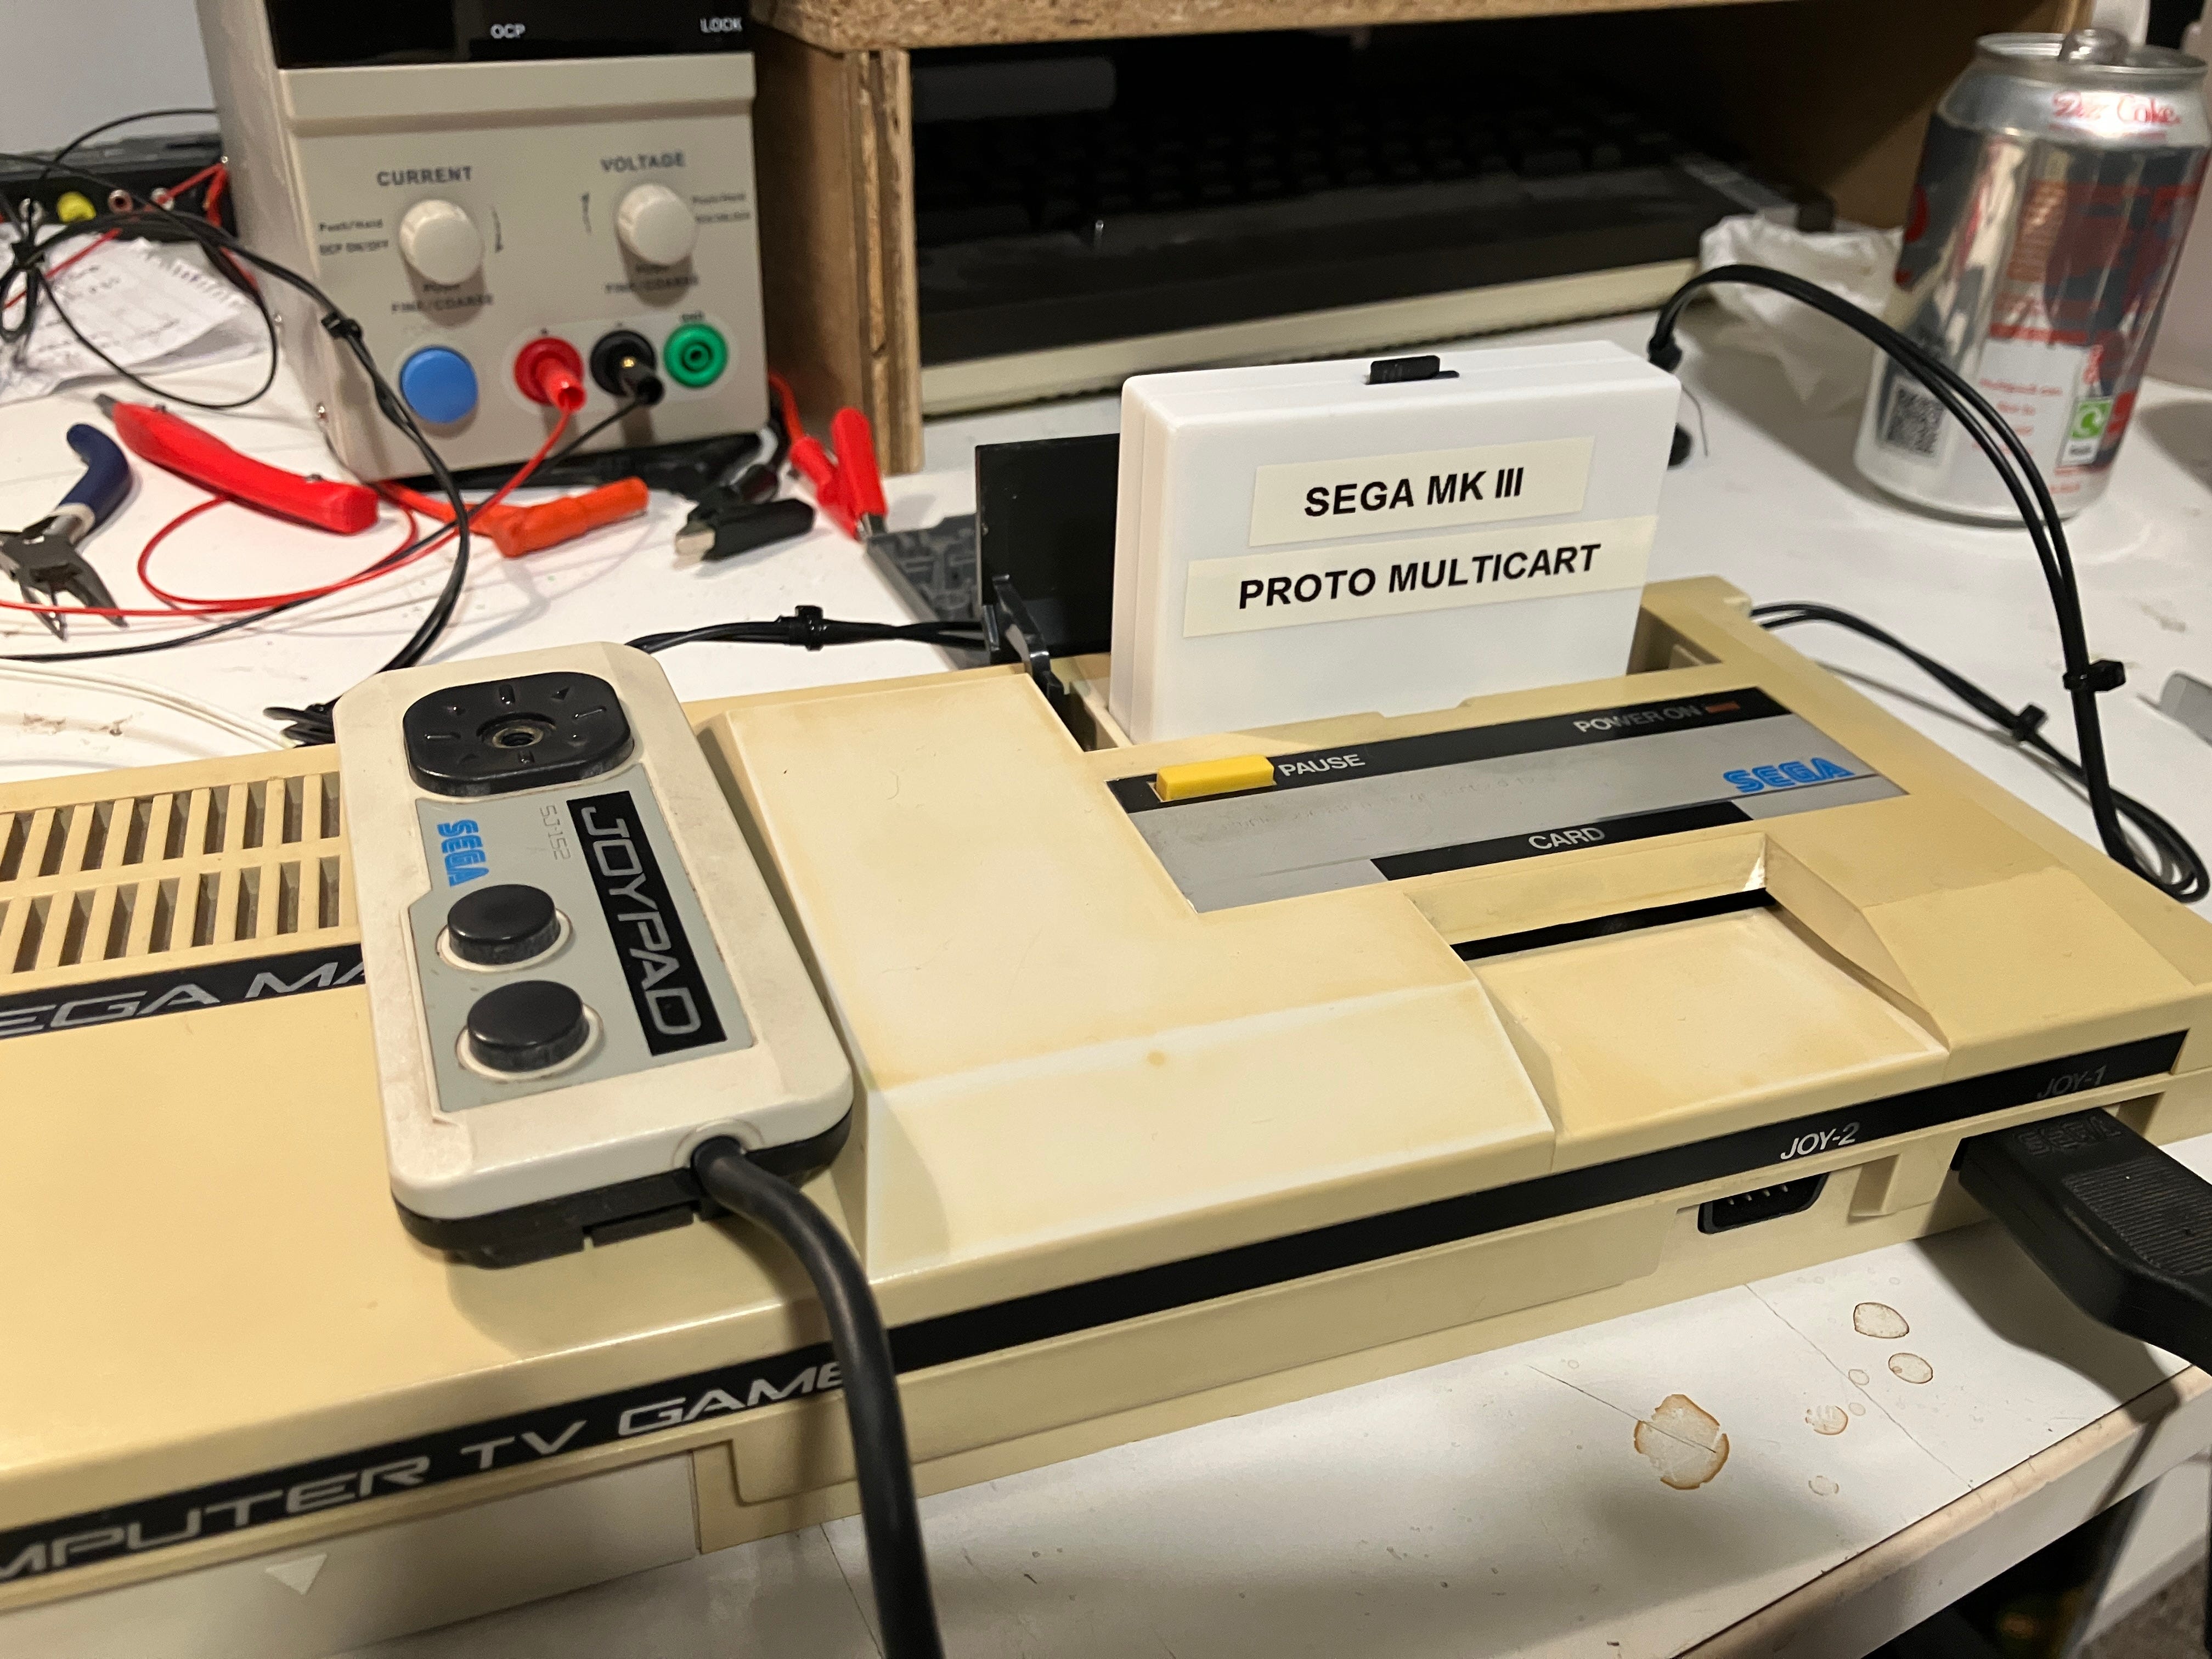
The finished product is more of a fitting BEIGE, just like the console. I even broke out the smooth 3D print plate, rather than the textured one I usually use.

Smooth, baby. Smooth.
Operation 3 - It’s All About Control
(She’s lost control again)
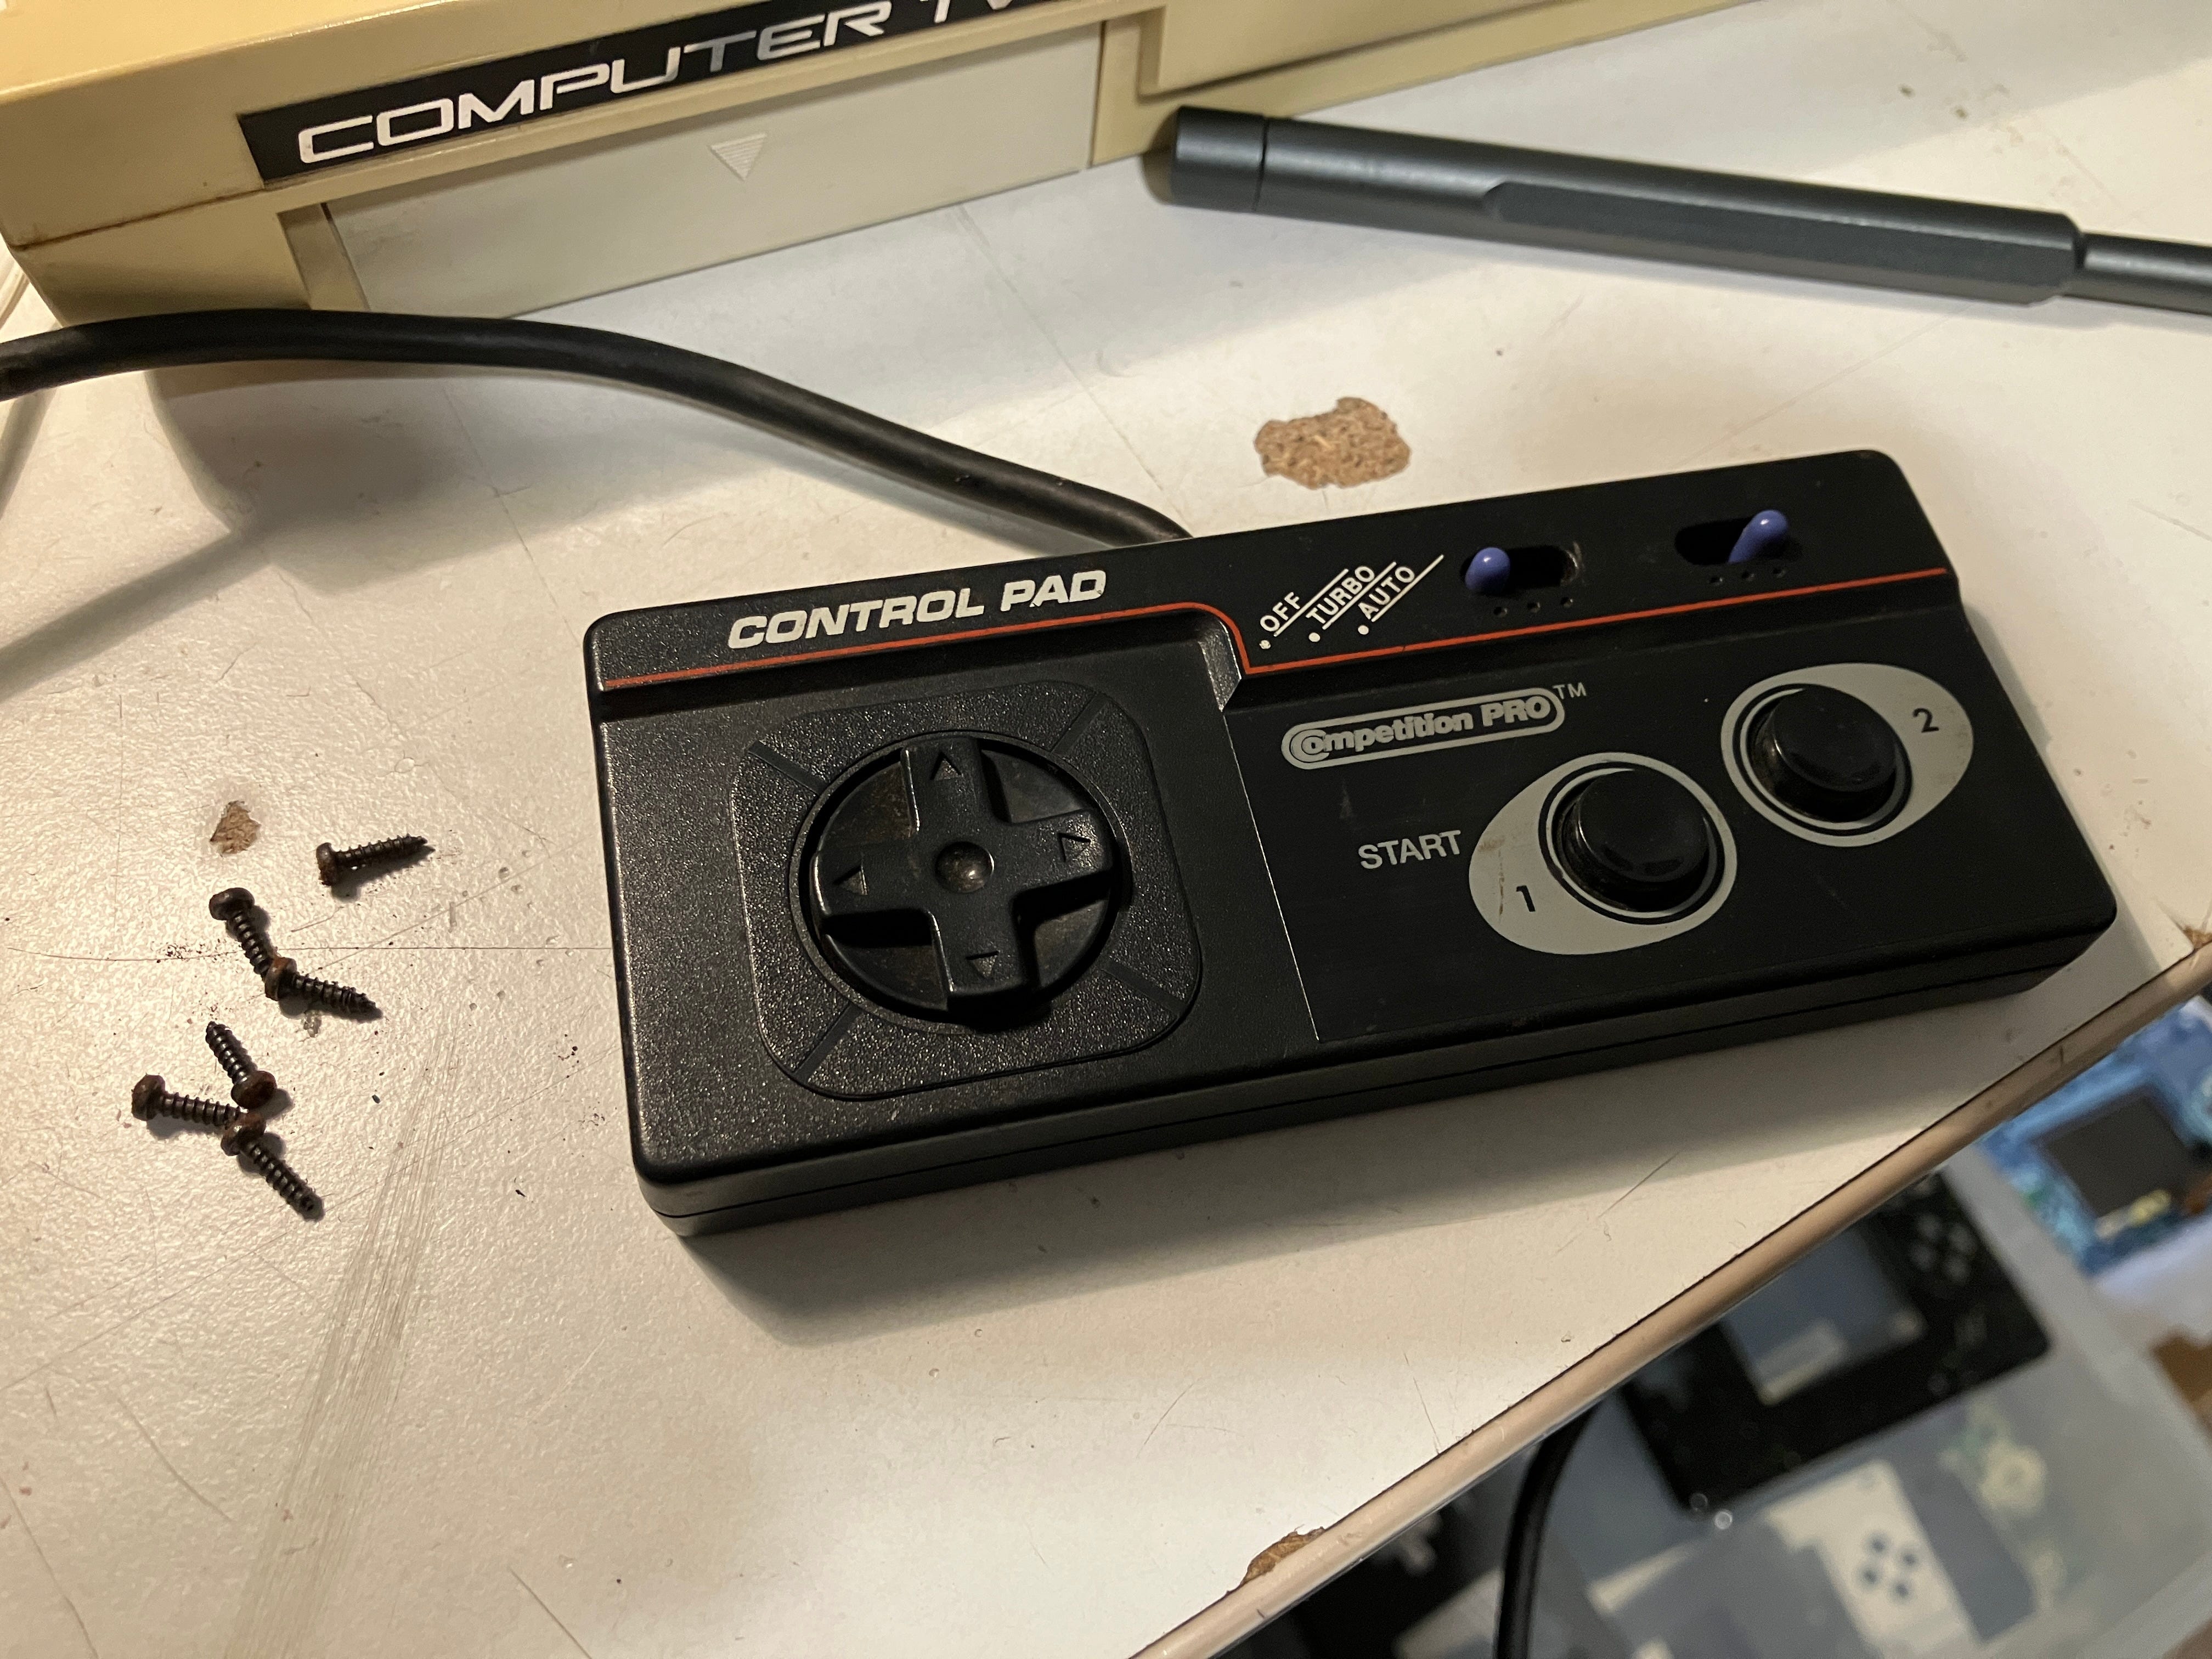
As said previously, the Mark III controller is a bit crappy. The odd square shaped control pad is weird and just doesn’t work very well. There was a good reason Gunpei Yokoi made the D pad in a cross shape - it just works. Don’t mess with perfection, Sega. As the OG controller looks lovely, I did’t want to mess with it. However, I was sent a pair of Honeybee master system controllers when I bought a second hand NES a while back. No idea why they were paired with a Nintendo console, but I wasn’t complaining bout getting some free joypads. One of them had ‘FULTY’ scrawled on the back in black Sharpie, so I knew one or both needed some attention. Turns out the buttons weren’t functioning on either. A quick ‘takey aparty’ and ‘cleany weany’ sorted the problem out. The next thing to do was make them look a bit like they were meant for use on the Mark III.
3D Printing incoming. Oh yes.
Ignore the fact it says ‘Competition Pro’ on the controller, it’s just a rebadged HoneyBee (it’s printed into the plastic on the back and on the PCB inside)
I removed the rusty screws and replaced them with new ‘uns. No way was this having rusty ass screws in it. Heaven forfend.
Here is the prototype controller with blurred text (I still haven’t got the hang of multi PLA text printing on 3D models) You can also see the ‘adjustments’ I made to the inside to get everything to fit. It works like a charm.
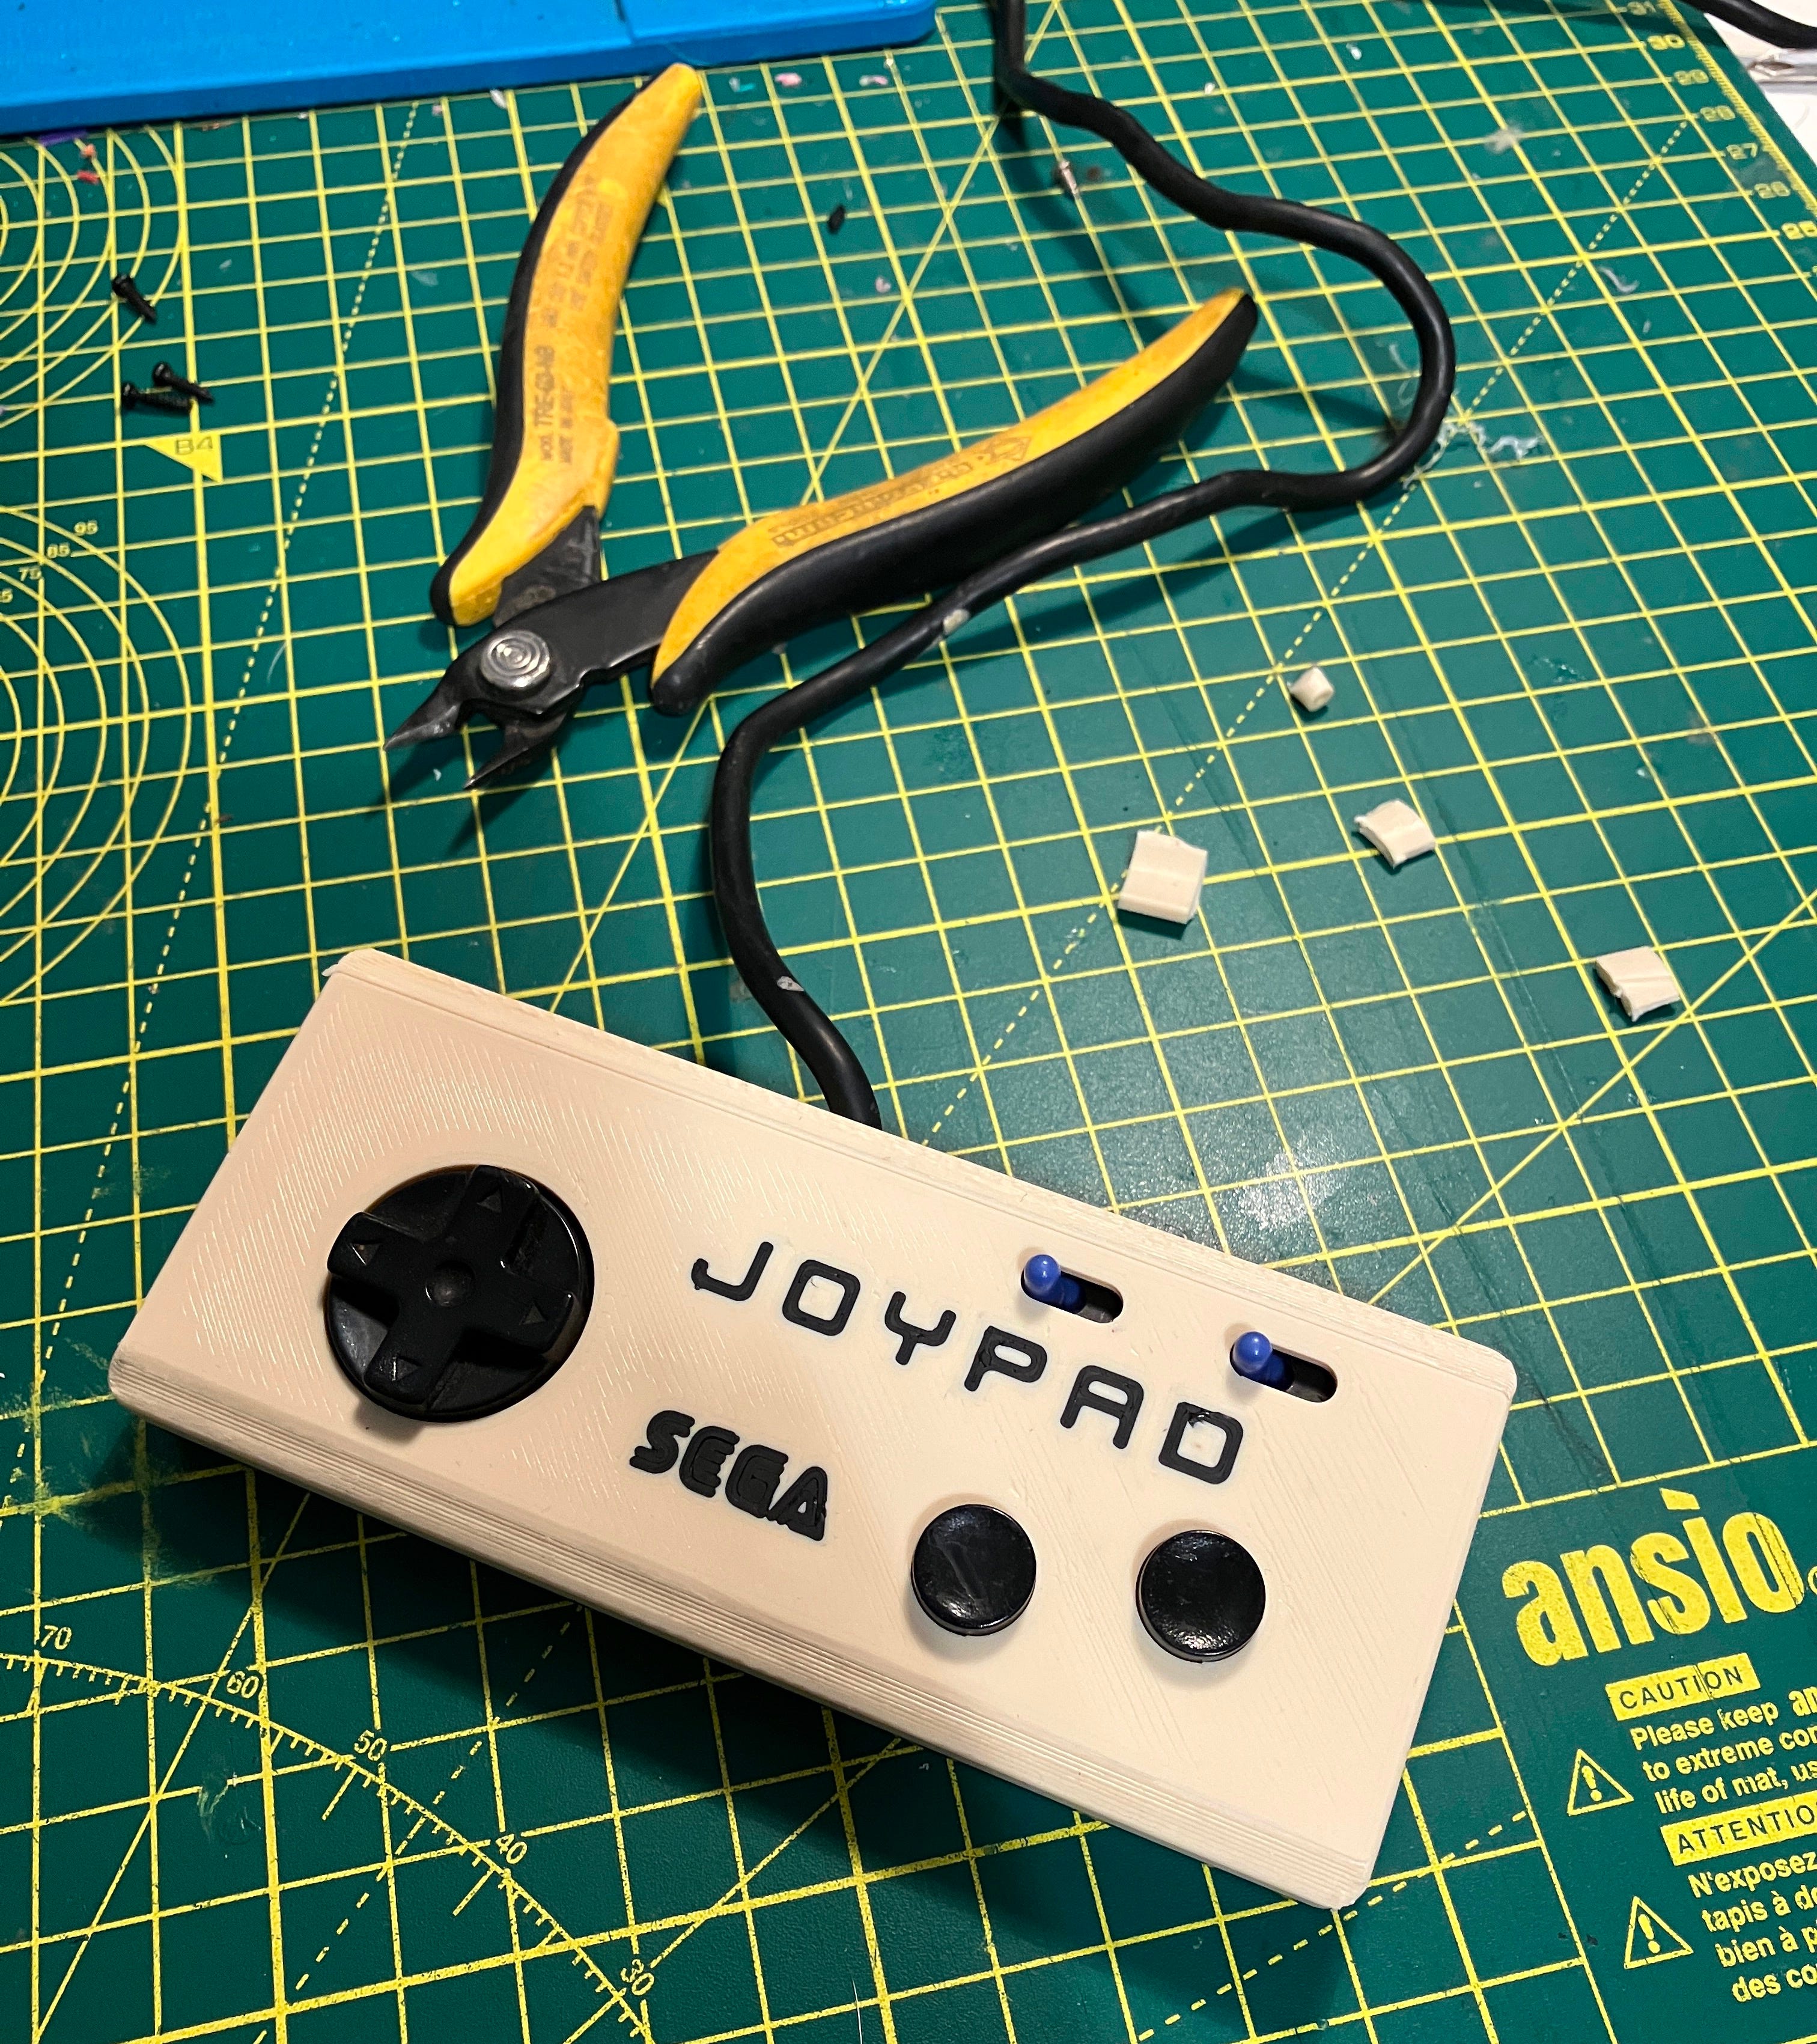
Here is the revised version. No need for hacking bits off now. Purple is the new blue (I don’t have any blue filament)
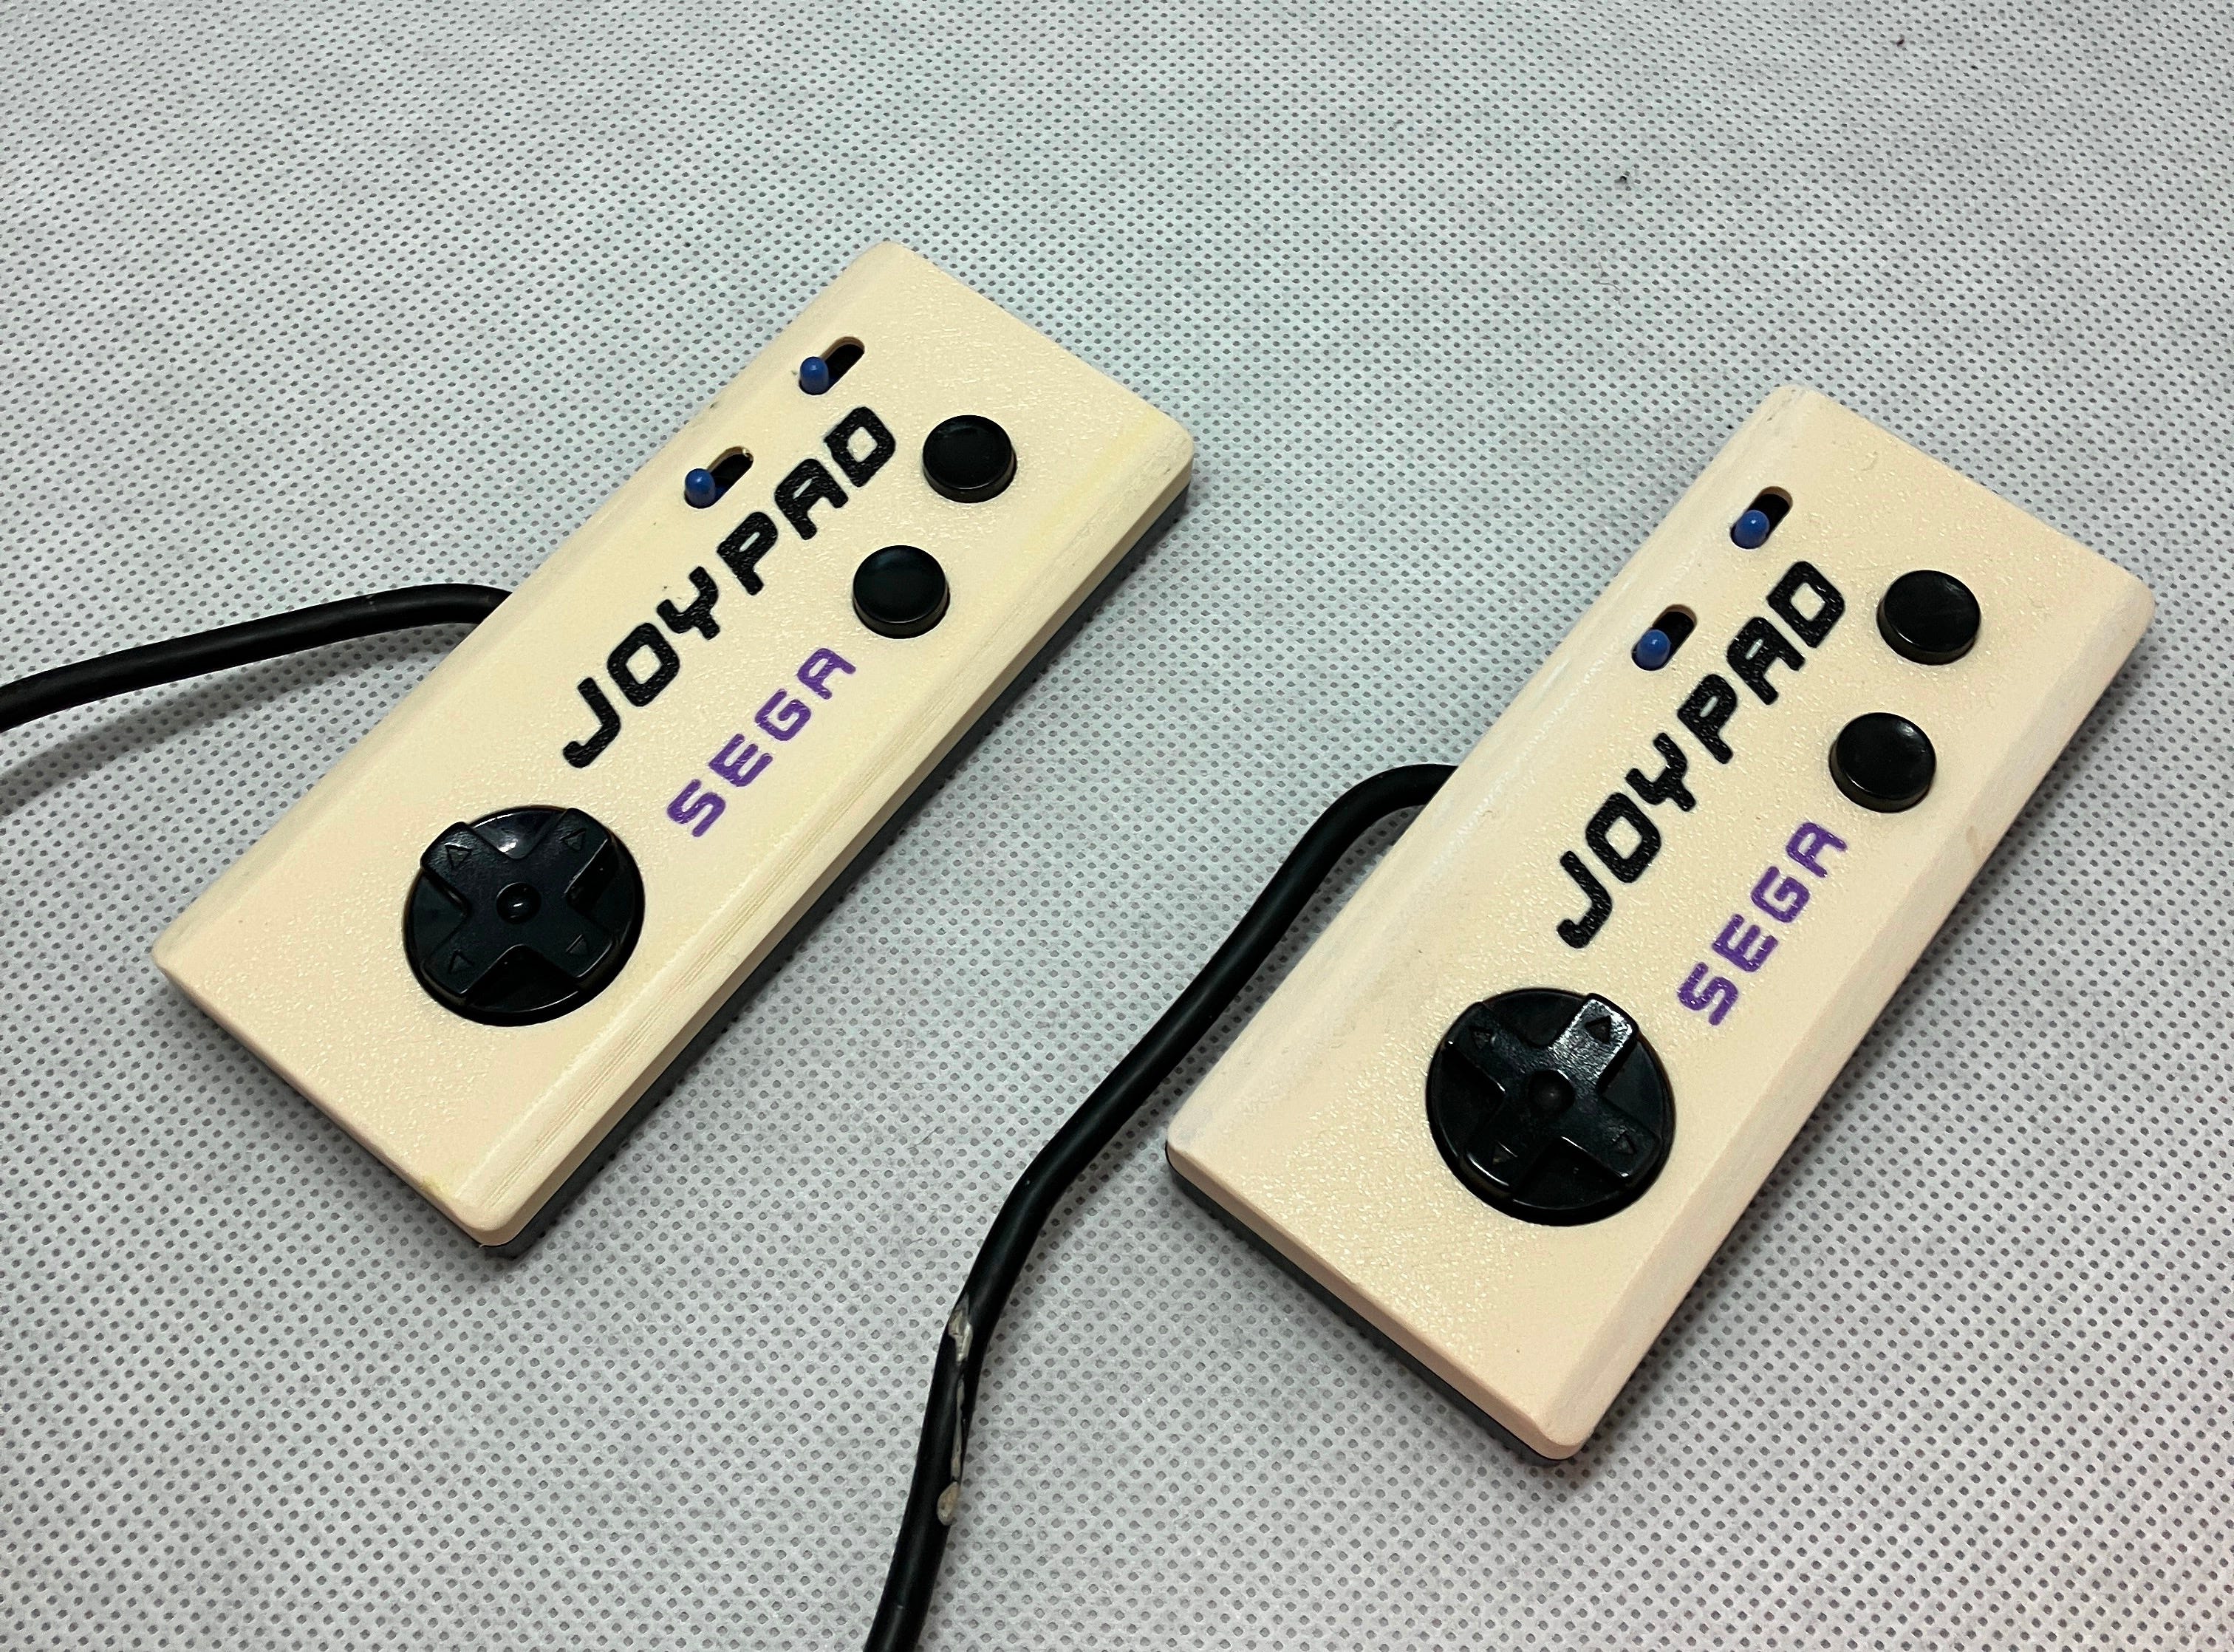
You will also have noticed that these Honeybees have two switches above the buttons. These are for Turbo and Continuous fire for both buttons. A handy feature. I also impressed myself with getting the fitment of the switches correct on the 3D print first time. There are some notches inside to give the switches a ‘click’ feel to them.
Conclusion
The three tasks have been fulfilled. I am very happy that my hunch on using the resistor for the washed out colours worked. A true five minute job.
The SD multi cart & converter also worked out well. Only thing that was a bit of a mistake, is I used some quite stiff orange wire on one side of the pins to join the 2 PCBs together. This made the cartridge shell parts a bit more difficult to fit, as the thick wires made the two parts difficult to budge inside the cartridge. I shifted some walls around inside the shell to get it right.
Controllers are nice, but with printing the front and back angles on a 3D printer, they always need work afterwards. Same with overhanging fillet rads. This is why I would always choose moulded cases (or CNC milled form solid) if I could, but needs must and a 3D printer is certainly better than nothing and at best can produce some very nice items.